

Why does my morning shower feel like a slow-motion car wash?
Low water pressure can turn household tasks into frustrating chores. Showers feel weak and unsatisfying, and appliances like dishwashers and water heaters may underperform.
In this guide, we’ll go over the key strategies to boost PSI levels:
- Simple fixes like cleaning faucet screens
- Adjusting the pressure reducing valve (or replacing it)
- Verifying that the main water shutoff is fully open
- The pros and cons of water pressure booster pumps
- And more…
Let’s get started!
Verify Current Water Pressure Before Making Changes
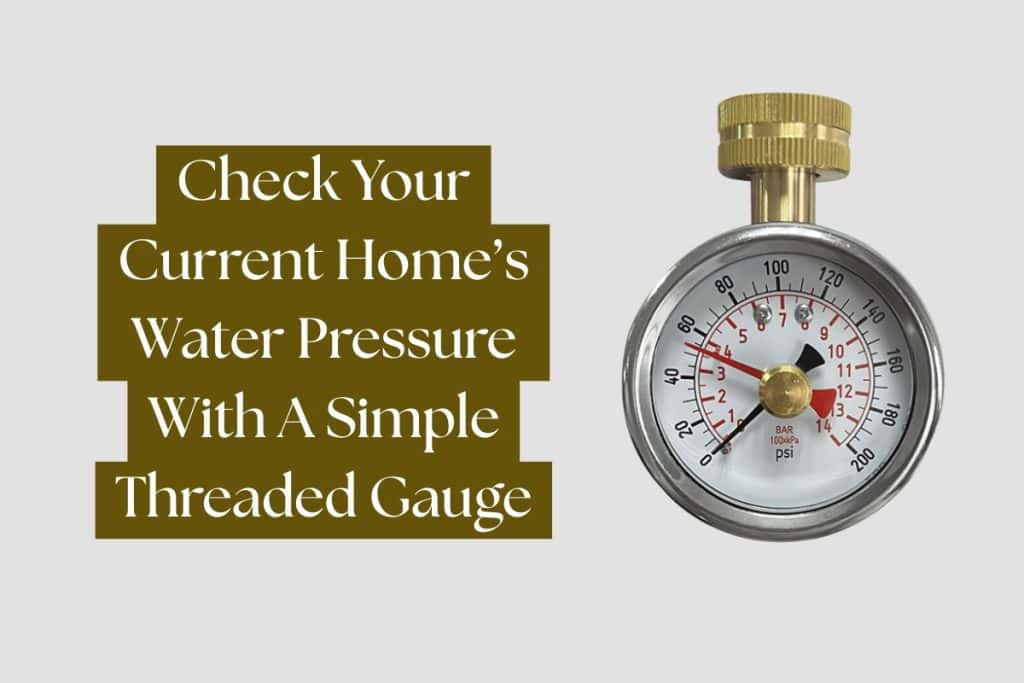
I recommend using a gauge to check your home’s water pressure, especially if the issue seems to affect the entire house.
A basic threaded gauge screws onto your hose bib or utility sink faucet for an instant PSI reading.
Why it helps:
- Confirms if pressure is low, normal, or too high
- Helps spot swings from city demand or a failing regulator
- Rules out supply issues before replacing fixtures or pipes
#1. Adjust The Pressure Reducing Valve (Best First Step)
If your home uses city water, it likely has a pressure reducing valve, typically found beside the main shutoff.
This bell-shaped brass valve lowers the incoming water pressure from your water utility to provide a safe PSI for your fixtures and pipes. Over the years, this valve deteriorates or builds up with mineral deposits (scale) that can dramatically lower water flow.
Also, a previous homeowner or contractor may have adjusted the valve to lower pressure below what you find desirable.
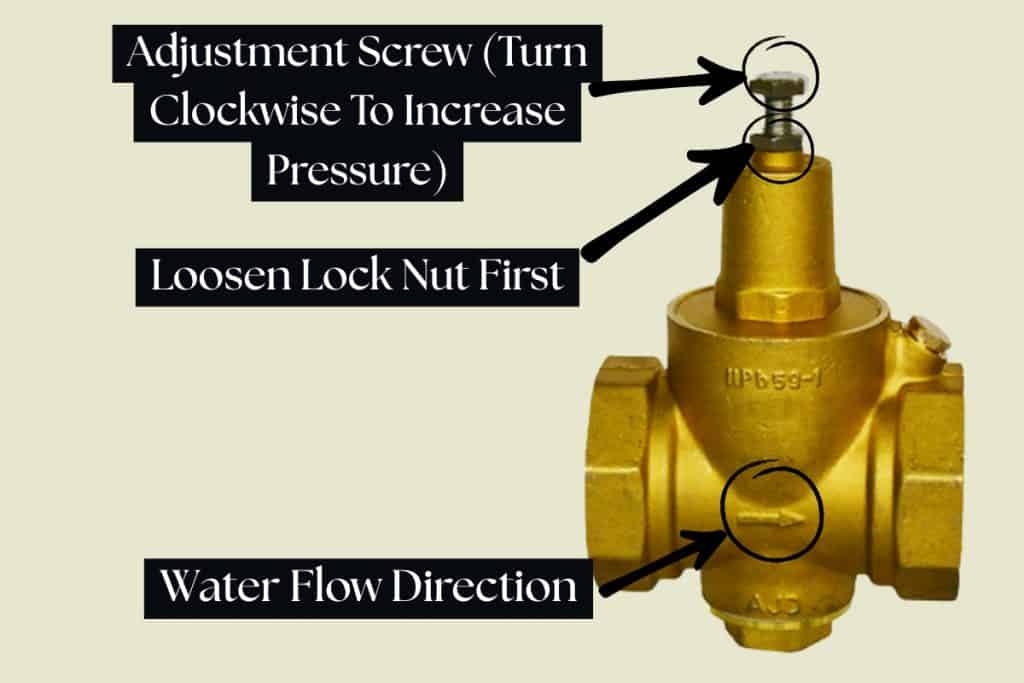
Fortunately, it’s an easy process of turning the adjustment screw to increase the pressure. In just a few minutes, you can increase the water flow to the maximum PSI allowed by the valve, which is typically around 75 psi.
Possible Risks
The hazard of adjusting your reducing valve is that it increases the possibility of leaks around older pipe joints and appliances. It also increases the likelihood of water hammer (pipes banging) when water suddenly shuts off.
Most building codes in the U.S. (including the International Residential Code) state a maximum pressure of 80 psi, but most plumbers recommend the 50-65 psi range. If you own a multi-level home or on a hill, you may need to get closer to 70-80 psi for adequate water flow.
5 Steps To Adjust The Pressure Reducing Valve (PRV)
- Locate Regulator: The reducing valve is almost always next to the main water shutoff and near where the main water line enters your home. It’s usually made of brass.
- Measure Current PSI (Optional): Attach a water gauge to an outdoor hose bib to measure current PSI level before making an adjustment.
- Loosen Lock Nut: Most reducing valves have a lock nut that needs to be loosened counterclockwise before you can make any adjustments.
- Turn Adjustment Screw: You will need to turn the adjustment screw clockwise with a screwdriver. I recommend doing this step gradually with a 1/4 or 1/2 turn.
- Check Pressure At Gauge (Optional): Check the water gauge on a hose bib to see the resulting PSI change.
#2. Clean Or Replace Aerators & Showerheads (Most Common Fix)
A common cause of low water pressure is mineral buildup in clogged aerators and showerheads.
Aerators are a type of filter that’s screwed onto the tip of sink faucets and just behind showerheads.
These devices filter debris but also mix air into the stream which saves water and boosts the perceived water pressure. Aerators make water feel stronger by increasing velocity and density but without actually raising pressure.
Typical Parts of Aerators
- Housing: The outer metal that screws onto the faucet.
- Screen: A fine mesh (metal or plastic) that catches debris.
- Disk: Some aerators have a disk that breaks the water into separate streams.
- Flow Restrictor: A small plastic insert that limits water volume to meet efficiency standards.
- Rubber Washer: The gasket that creates a watertight seal between the aerator and the faucet.
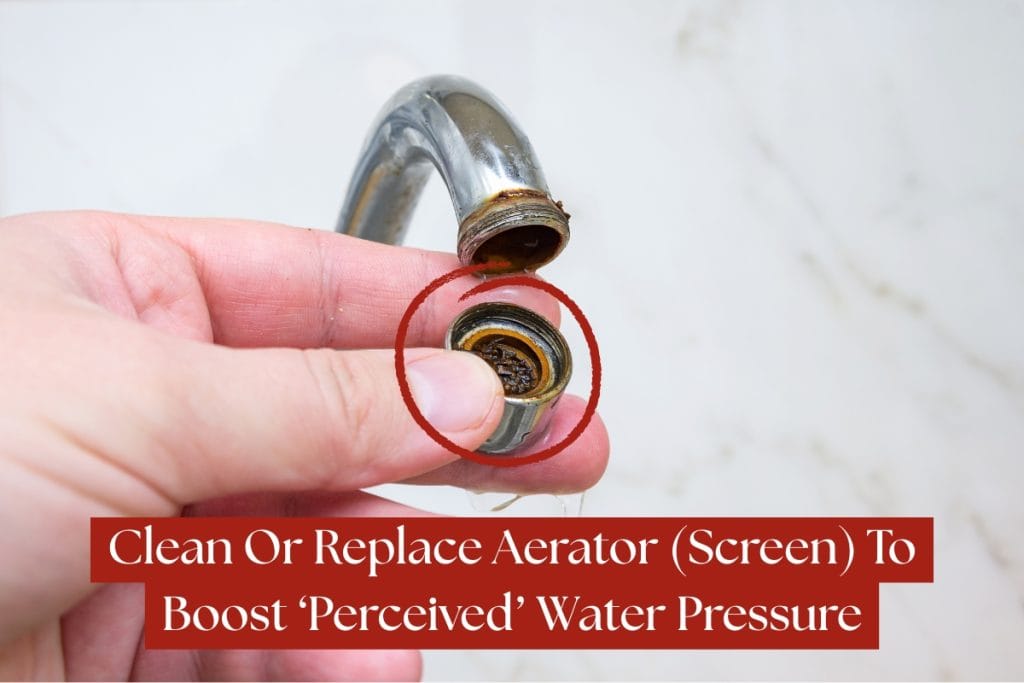
Aerators get clogged over time with mineral deposits that can reduce your water to a little stream. Fortunately, cleaning or replacing aerators is relatively easy and they just need to be unscrewed from the faucet.
Check out our guide on how to fix a leaking faucet for a deeper look at aerator installation.
Ideally, aerators should be cleaned every 6-months and replaced every couple years.
The biggest hazard of cleaning or replacing aerators is damage to your faucet if you overtighten it and damage the threads. Make sure to put a rag over the sink drain to prevent any part of the aerator from getting lost.
6 Steps To Cleaning Or Replacing Aerators
- Cover Drain: Cover or plug the sink or tub drain with a rag to prevent a screen, o-ring, or flow restrictor from getting lost.
- Remove From Faucet: Loosen the aerator by turning it counterclockwise from tip of faucet. If it’s stuck, cover it with a rag to prevent scratches, and then use channel lock pliers to grab onto it and turn counterclockwise.
- Remove From Showerhead: The aerator is just behind the showerhead in the pipe (or between flex pipe and showerhead). Some showerheads only have flow restrictors, and you may need to use needle-nose pliers to grab it.
- Clean It: Disassemble the aerator, keeping track of the order of the parts. Check for debris or damage. To clean, soak it in white vinegar for 30-60 minutes and then scrub it with an old toothbrush. Use a needle or toothpick to remove stuck debris in the screen or flow restrictor.
- Replace Aerator: If you want to replace the aerator, take the part to your local hardware store for an exact match. Otherwise, you can buy one online if you can get the exact model name of the faucet or showerhead.
- Install New One: Re-assemble the aerator in the same order, and then hand tighten it clockwise back onto the fixture. For a showerhead, make sure to use Teflon tape on the threads for a leak-free installation.
#3. Remove Or Replace Faucet Flow Restrictors (Most Effective Modification)
Faucets often contain plastic or rubber flow restrictors that reduce water flow, alongside the screen. These devices are a part of the aerator which is located at the tip of the faucet (or behind the shower head) and mixes water with air.
Manufacturers are required to have built-in flow restrictors to meet water efficiency building codes.
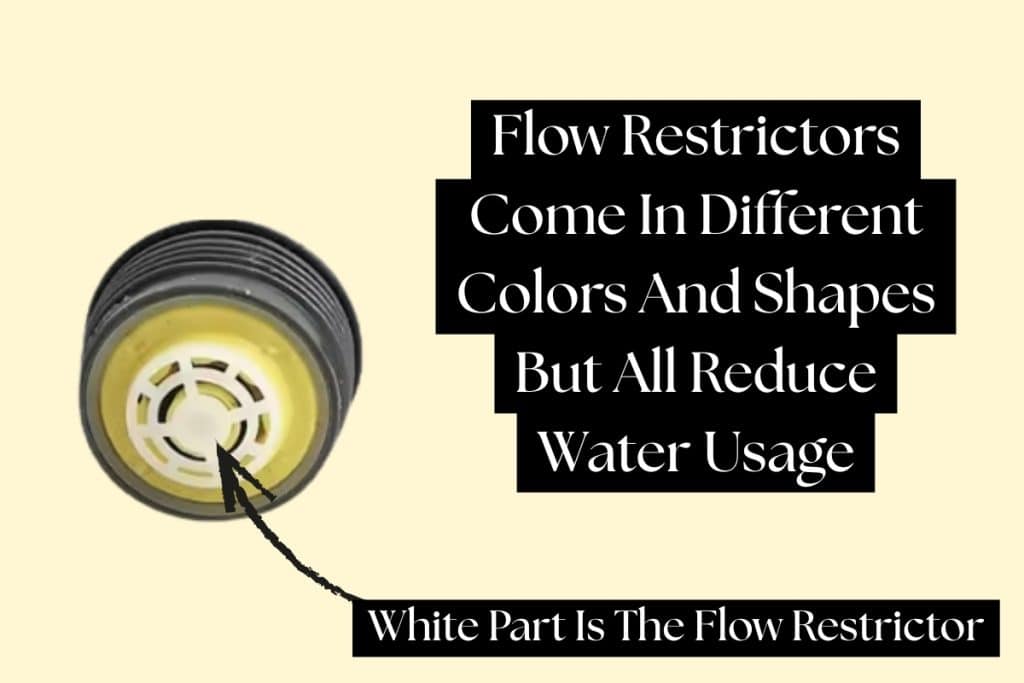
Just as a heads up, removing flow restrictors will likely violate local building codes. However, taking out flow restrictors can significantly boost water pressure at your shower or faucet.
You can also just replace it with a compatible flow restrictor that has a larger hole to allow more water through it. The obvious downside to removing these devices is increased water usage and costs — in addition to violating codes.
5 Steps To Removing Or Replacing Flow Restrictors
- Locate The Aerator: For faucets, it’s the threaded tip at the spout end. For showers, it’s usually located just behind the showerhead.
- Unscrew It: Turn counterclockwise by hand or use a channel-lock pliers covered with a rag or tape to prevent scratches.
- Disassemble Aerator: Use a pair of tweezers or a small screwdriver to gently lift out the rubber O-ring and the mesh screen so you can see the flow restrictor underneath. Look for a colorful little plastic star or circle, usually green, white, or pink, which is the actual flow restrictor.
- Remove Or Replace The Restrictor: Use needle-nose pliers or your hands to pull out the flow restrictor, but be careful not to gouge the metal threads inside the fixture. To replace the restrictor, you will likely have to search online for your exact fixture model.
- Reassemble Aerator: Pop the rubber washer and screen back in place, screw the head back onto the pipe.
#4. Fully Open Main Water Shutoff (Easiest Check)
If your entire home has low water pressure, the cause could be a partially closed main shutoff or water meter valve.
If you recently had plumbing work done, or bought a new house — someone accidentally may have left the shutoff a little closed. Even for a curious kid, it isn’t that hard to turn a main water shutoff.
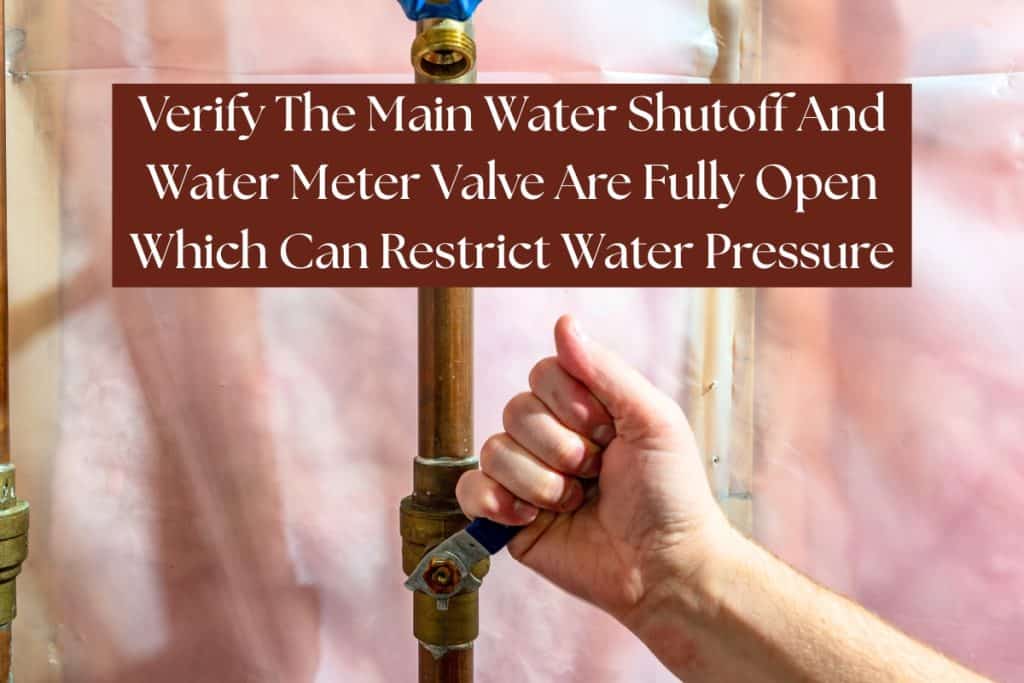
Checking the main water shutoff is straightforward. If you have a ball valve with a straight handle of a few inches, the handle should be inline with the water pipe or parallel.
If there is a gate valve with a circular handle, it should be turned fully counterclockwise to be completely open.
Water Meter Valves
A water meter can be a bit trickier however, especially if it’s at the street, and you may need a special key to check the valve so a plumber is recommended. With indoor water meters, take a look at any valve by its side and make sure it’s fully parallel with the main water line. You may need a wrench to turn it fully open.
I recommend checking with a plumber that all shutoffs are fully open if you have any suspicions or don’t feel comfortable doing it.
5 Steps To Checking Main Water Shutoff And Water Meter Shutoff
- Locate Meter & Main Water Shutoff: Outdoor meters are usually covered by a round metal or plastic lid. Indoor meters are typically near the main water line enters the home. Main water shutoffs will usually be next to the water heater or where the main line enters your home from exterior.
- Identify Your Valve Type: Determine if you have a ball valve with a straight lever or an old-school gate valve that looks like a round, circular faucet handle. The water meter may have a valve that requires a wrench to turn it.
- Open It Fully: Push the lever until it is perfectly parallel with the pipe, or turn the round wheel counter-clockwise until it hits the “stop” to ensure the internal gate is retracted.
- Check For Leaks: Keep a close eye on the handle’s base after moving it; if you see a tiny drip, give the packing nut directly behind the handle a small nudge with a wrench to seal it back up.
#5. Check For Plumbing Leaks (Most Important Maintenance)
Since your plumbing is under pressure, a small leak anywhere — like at a sink, toilet, or joint— can reduce water flow noticeably.
The best way to check for leaks in the entire plumbing system (besides visual) is to turn off all individual water valves/shutoffs to your sinks, faucets, and appliances — and to then check your water meter to see if it advances. Do NOT turn off the main water shutoff while doing this strategy.
If the water meter records usage when all your valves are OFF, then you have a leak somewhere in the plumbing.
You may want to get a plumber on your side to help if you suspect a leak since it may be behind a wall, under a slab, or somewhere else inaccessible.
I also recommend using a flashlight to inspect underneath all sinks and to verify that none of the toilets are running when not in use.
Fixing any leaks can restore lost water pressure AND help protect your home from water damage, wood rot, and mold issues.
The downside to fixing water leaks is it can get costly if you are opening walls or slabs. And fixing tiny leaks in your plumbing system doesn’t guarantee a detectable water pressure boost — though it’s still an obvious benefit for other reasons.
4 Steps To Checking For Plumbing Leaks
- Check Water Meter: With all individual water valves to your fixtures and appliances closed (keep main water shutoff OPEN), watch the water meter dial. If the usage advances, you have a leak or running toilet somewhere in the home.
- The Toilet Dye Test: Drop some food coloring or a dye tablet into the tank and wait fifteen minutes without flushing; if color seeps into the bowl, your flapper is ghost flushing and stealing pressure from the rest of the house. If this is happening, check out our guide on how to fix a running toilet to get it sorted in a few minutes.
- Close The Main Shut Off Valve: Close the main valve inside your home and check the meter again; if the meter is still moving, the leak is hiding in the service line buried in your yard. This test only applies if your meter is outside past the main shutoff.
- Look For Corrosion: Grab a flashlight and peek under every sink for calcium deposits or green corrosion on the joints, which are the classic signs of a slow, pressure reducing drip.
#6. Flush Water Heater (Best For Hot Water Only)
Water heaters naturally collect sediment over time, which is just minerals settling at the tank’s base.
All of this gunk can clog up the hot-side piping (or dip tube and outlet nipple) leading to reduced water flow when you use hot water. If your cold water has higher water pressure than hot, this is a tell-tale sign that your water heater may be to blame.
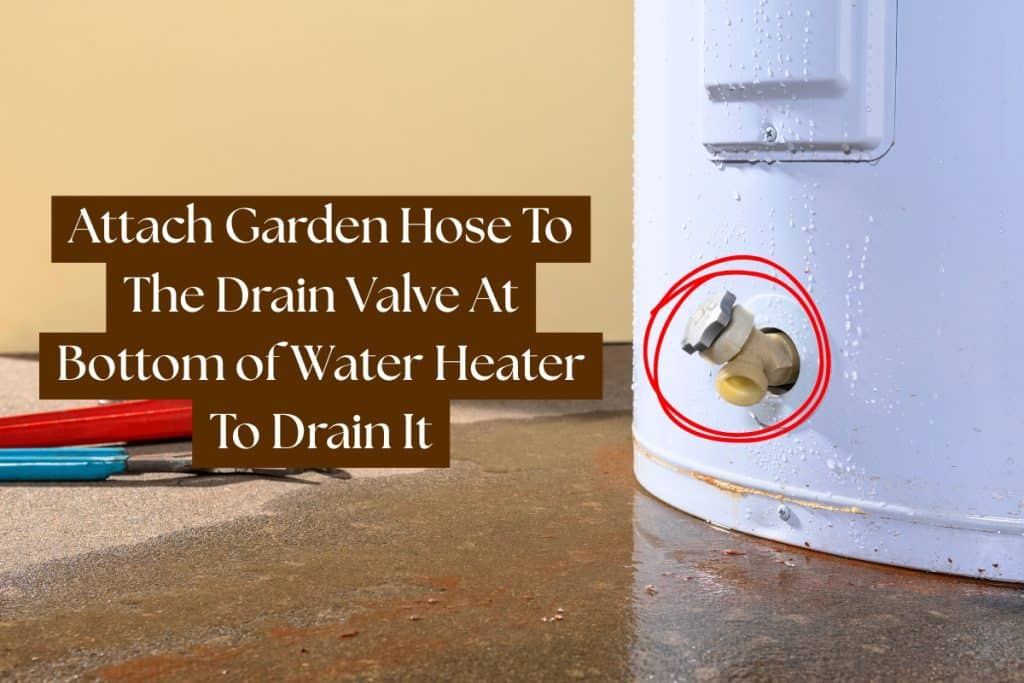
It is recommended to flush or drain your water heater once a year, but most homeowners rarely if ever do this maintenance task.
The basic idea is to attach a garden hose to the drain valve at the bottom of the tank, and drain out all the water along with the sediment.
Pro Tip: Before you begin, check out our full guide on how to flush a water heater. It covers the two main strategies of power flush and gravity-only method to flush it.
Signs That It Needs A Flush
- Popping or Rumbling: Loud noises caused by sediment buildup.
- Low Hot Water Flow: Pressure drops occurring only when using hot water.
- Temperature Swings: Water takes longer to heat or runs cold quickly.
- Discolored Water: Rusty, cloudy, or sandy-looking hot water.
- Foul Odors: Rotten egg smells indicating bacteria in the tank sediment.
Flushing Risks
Just be careful if you have an older water heater because drain valves are notorious for leaking after it’s shutoff, and it may need to be replaced. You may want to skip this strategy for water heaters older than 8 years or ones that have visible rust/corrosion since the tank itself may leak.
There is also a risk of burning out the heating element for electric units if you don’t fully shutoff off the power prior to draining. If you have small children or pets, there is a risk of scalding since the water drained is scalding hot — you may want to let the tank cool down prior to draining.
5 Steps To Flushing Water Heater
- Turn Off Power or Gas: Shut off the circuit breaker for electric heaters or turn the gas control to “Pilot” or “Off.”
- Shut Off Cold Water: Close the cold water supply to the top of the tank.
- Connect Hose & Drain: Attach a garden hose to the drain valve at the bottom and run it to a safe drainage area. Open the drain valve, a hot water faucet, and the T&P relief valve to allow smooth draining.
- Flush Tank: Once empty, briefly open the cold water supply in short bursts to rinse out remaining sediment.
- Refill & Restore Power/Gas: Close the drain valve, remove the hose, refill the tank, close the T&P valve and faucet, and restore power or relight the burner.
#7. Replacement of Pressure Reducing Valve (Best Mid-Range Repair)
An old or failing pressure reducing valve (PRV) can lower your home’s water pressure if it becomes stuck or clogged with mineral buildup.
These valves have a lifespan of around 10-15 years and replacing it can solve water pressure issues — especially if the pressure is still low after turning the adjustment screw. If you live an area with hard water, the lifespan of the valve may be reduced to 5 years or less.
Signs That The PRV Should Be Replaced
- Age: A pressure reducing valve that is 10-15 years or older.
- Noisy Pipes: Humming, thumping, or whistling sounds (water hammer).
- Erratic Pressure: Flow that fluctuates wildly between high and low.
- Leaking Fixtures: Constant drips from faucets or appliance relief valves.
- Physical Damage: Visible rust, corrosion, or leaks on the valve body.
A degraded PRV and rubber seals can cause water hammer, running toilets, and even corrosion at pipe joints due to rapid pressure changes.
Modern valves will give consistent and accurate water pressure compared to old valves. A new PRV can help protect and extend the life of your appliances and pipes as well.
Buy Same Model For Easier Install
I suggest swapping in an exact replacement valve — it fits the existing pipe unions and keeps installation straightforward. You may want to consult with a plumber since the PRV may be an outdated model or you may need one with a higher pressure rating or with a newer design.
The main downsides are the possibility of leaks after the installation or replacing it with a wrong model that doesn’t give the right amount of pressure (50 psi to 60 psi ideally).
6 Steps To Replacing The Pressure Regulating Valve
- Buy Replacement: Ideally, buy a PRV with the same model for an easier install. If it’s a different model, make sure it fits your piping 3/4″ or 1″ and has the same length so you can reuse the union fittings on the pipe connections.
- Turn Off Water: Shut off water at the main water shutoff.
- Open Two Fix