
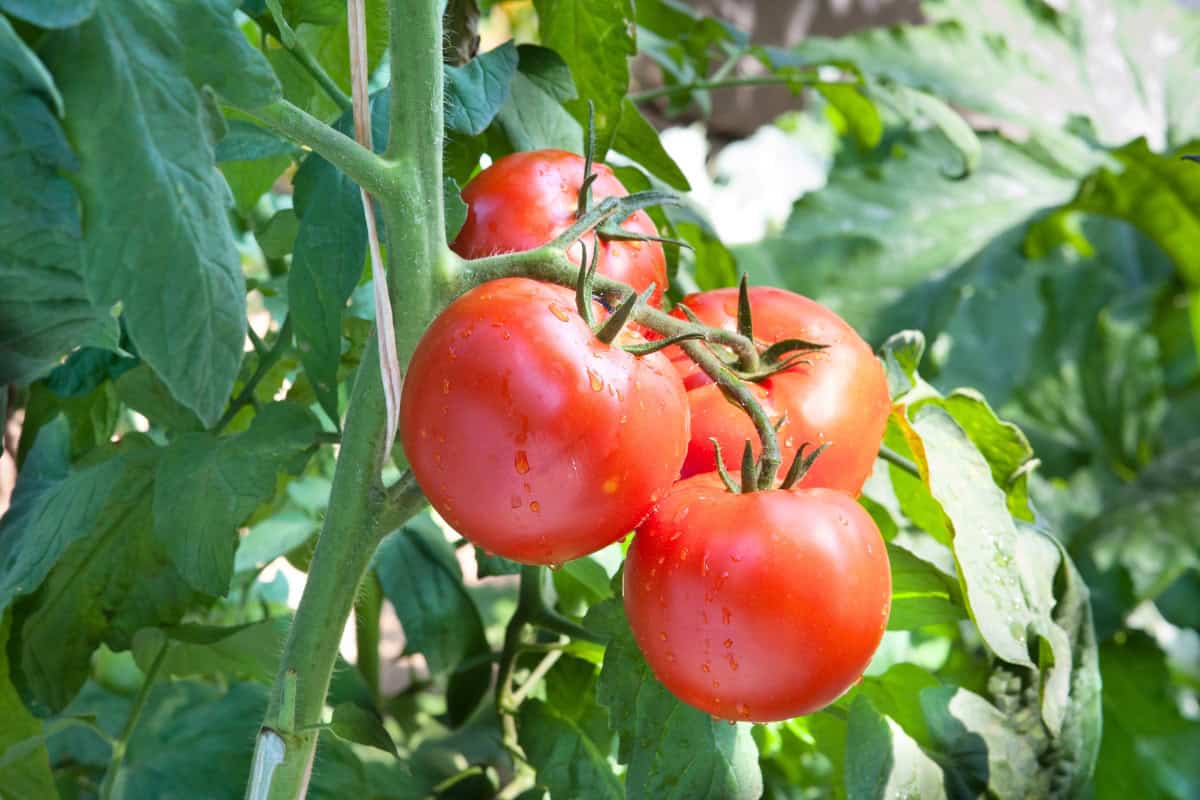
Last summer, thousands of people found black spots on the bottom of their tomatoes, and they wondered what had happened. This issue was completely avoidable by following the tips in this guide.
Tomatoes are not high-maintenance, but they have preferences. Once you know them, growing a successful crop is less about luck and more about planning.
In this guide, we’ll go over how to:
- Stop blossom-end rot with moisture and pH
- Pick at breaker stage to avoid pests
- Pinch suckers to boost fruit size
- Wait for 50°F nights to prevent stunting
- Use companion plants as natural shields
Below are the essential tips and checklists you need to grow tomatoes successfully.
Step #1: Choose Your Variety
Your first and most important decision is choosing which types of tomatoes to grow. That means understanding the difference between determinate and indeterminate varieties. Your climate, space, and intended use should drive your choice.
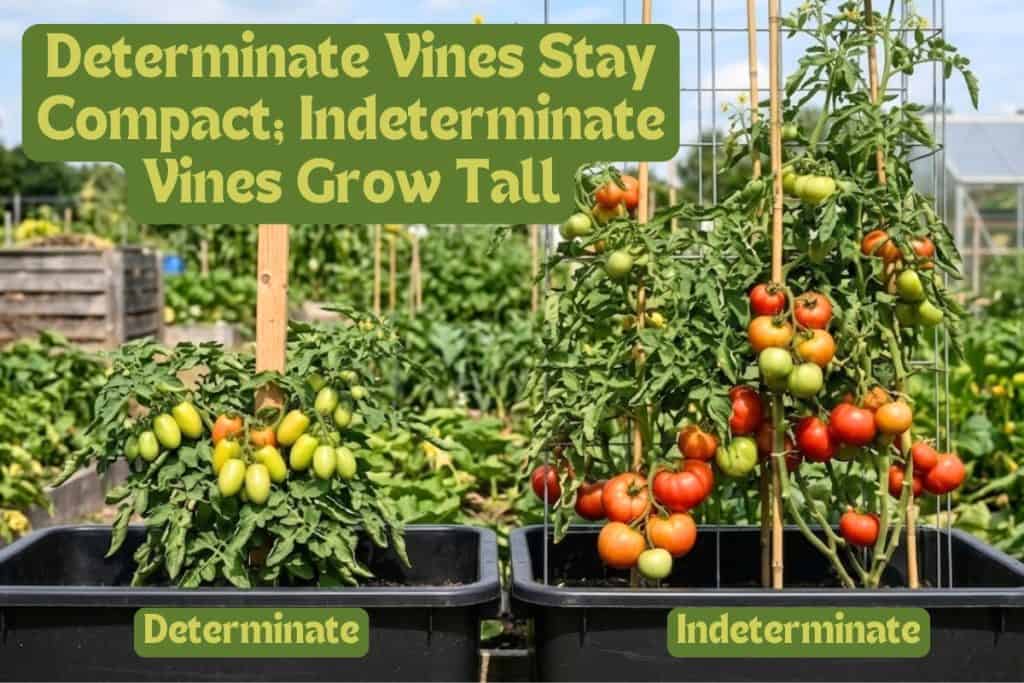
Determinate tomatoes, sometimes called bush tomatoes, grow to a fixed height, typically 2–4 feet, produce their fruit over a concentrated period of two to three weeks, and then stop growing and fruiting.
Because they stay small, they don’t require staking and are well suited for containers. If you want a large harvest at one time for sauces or canning, determinate varieties will best meet your needs.
Variety Quick Reference
- Determinate varieties: containers and small gardens; sauces and preserving; e.g., Roma, Rutgers, Celebrity
- Indeterminate: large gardens, trellises, and fresh eating; e.g., Brandywine, Big Boy, Beefmaster
- Compact hybrids: best of both; e.g., Tumbling Tom, Patio, Tumbler F1
Indeterminate tomatoes keep growing and fruiting continuously from midsummer to first frost. They can grow to 6 feet or more, need substantial support, and require regular pruning to stay productive. They produce a steady supply of tomatoes throughout the season.
If you have a short growing season, a determinate variety gives you the best chance of a full harvest before temperatures drop. In a long, warm season with good support structures, indeterminate varieties are preferred.
For container growing, compact determinate or dwarf varieties bred specifically for small spaces are almost always the best option.
Potatoes share similar growth habits with tomatoes; I invite you to read how to grow your best potato crop here.
Step #2: Optimize Sun and Soil
Tomatoes love sunshine, so without adequate light, your plants will sit idle, fruit will be sparse, and the flavor will be disappointing. For a productive crop, you need a minimum of six hours of direct sunlight per day, with eight to ten hours even better.
To decide where to plant, watch the sun move across your landscape throughout the day. A sunny spot in the morning may be in full shade by midday. Spend a day or two observing the sun before you commit to a location.
Soil Preparation
Proper soil preparation improves root growth, helps plants handle heat stress, reduces soil-borne problems, and supports steady flowering and fruiting. In short, it’s crucial.
The right soil will give you:
- Better soil structure; loose soil allows deeper roots
- Balanced fertility for early growth and fruit set
- Calcium availability reduces blossom-end rot
- Less disease through rotation, sanitation, and soil biology
Tomatoes are heavy feeders and stress-sensitive. When soil is compacted or low in organic matter, you see issues like poor flowering or blossom-end rot.
To create the ideal soil, follow these steps:
7 Steps to Soil Preparation
- Plan for crop rotation with other nightshades (peppers, potatoes, eggplant) each season.
- Add soil amendments 1 to 3 weeks before transplanting.
- Test the soil structure. Push a spade or garden fork into the bed. If it goes in easily, you do not need to till. If it’s hard to penetrate, loosen at least the top layer.
- Test soil pH and adjust. Tomatoes grow best in slightly acidic soil with a pH between 6.0 and 6.8
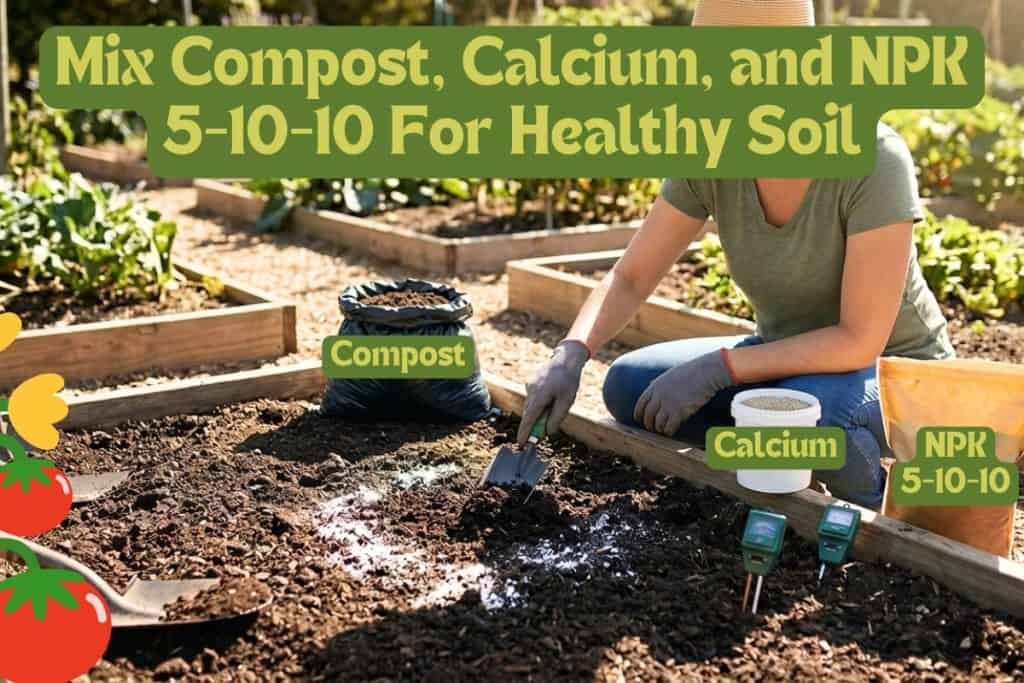
- Add calcium (dolomitic lime, gypsum, or oyster shell) to support fruit quality and reduce blossom-end rot.
- Increase fertility with NPK fertilizer. Prioritize phosphorus (P) and potassium (K) over nitrogen.
- Add 2-4 inches of compost to the top layer for soil structure and fertility
Garlic is a perfect companion for crop rotation; check out our guide on how to grow garlic plants here.
Step #3: Success With Containers
If your best sunny spot happens to be on a patio or balcony, don’t be discouraged; tomatoes are one of the easiest container crops you can grow. Containers are also a good alternative when you don’t have the proper soil for success.
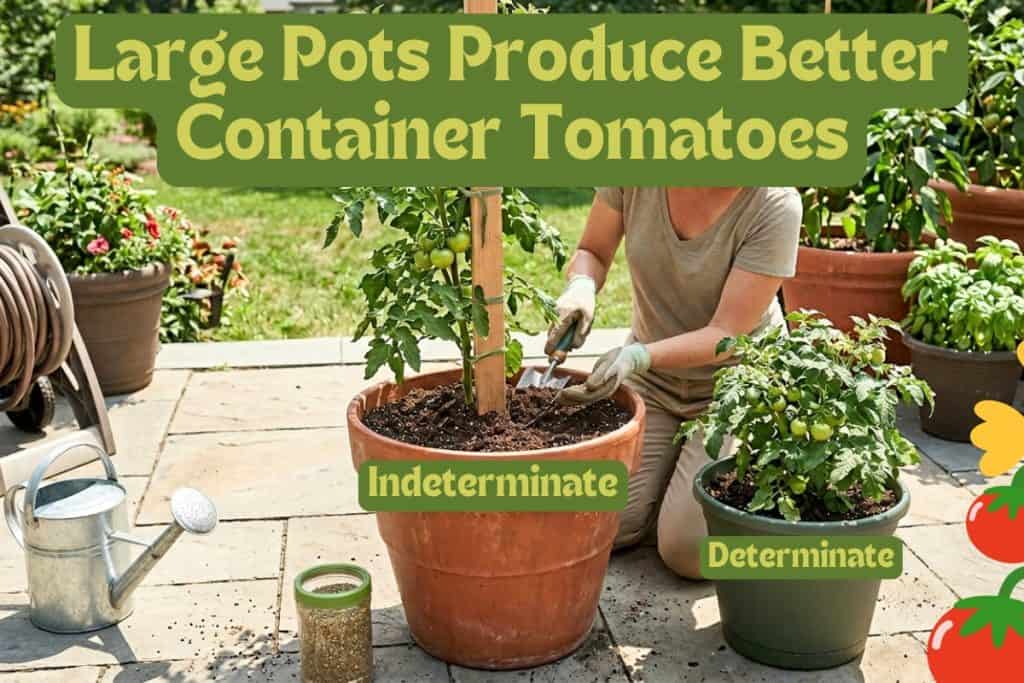
Pots give you flexibility, including the ability to move them for more sun or bring them in before a freeze. One big mistake container growers make is choosing a pot that is too small. Tomatoes have extensive root systems, and cramped pots lead to stress, reduced yields, and watering issues.
Container tomatoes need the same fertilizer as growing them in-ground, but more often, since nutrients leach out with watering.
4 Steps to A Successful Container Garden
- Choose a large pot with adequate drainage; indeterminate varieties need larger pots than determinate ones.
- Use a high-quality potting mix blended with perlite or coarse sand. Consider adding water-holding crystals if not in the mix.
- Add a stake or other support for indeterminate plants.
- Position in the sunniest available spot; water daily during hot spells.
Avocados are another rewarding project for small spaces; check out our beginner’s guide on growing avocados from seed here.
Step #4: Timing And Spacing
Timing is more than simply waiting until the last frost has passed. Planting too early will not give you a head start; instead, it will stress your plants and stunt their growth. Equally, transplanting into very hot soil can cause roots to struggle.
Risk of Planting at the Wrong Time
- Too cold: plants yellow and stall; disease risk rises
- Too hot: roots struggle; shade plants for the first few days
- Frost risk: one late frost will kill an unprotected seedling
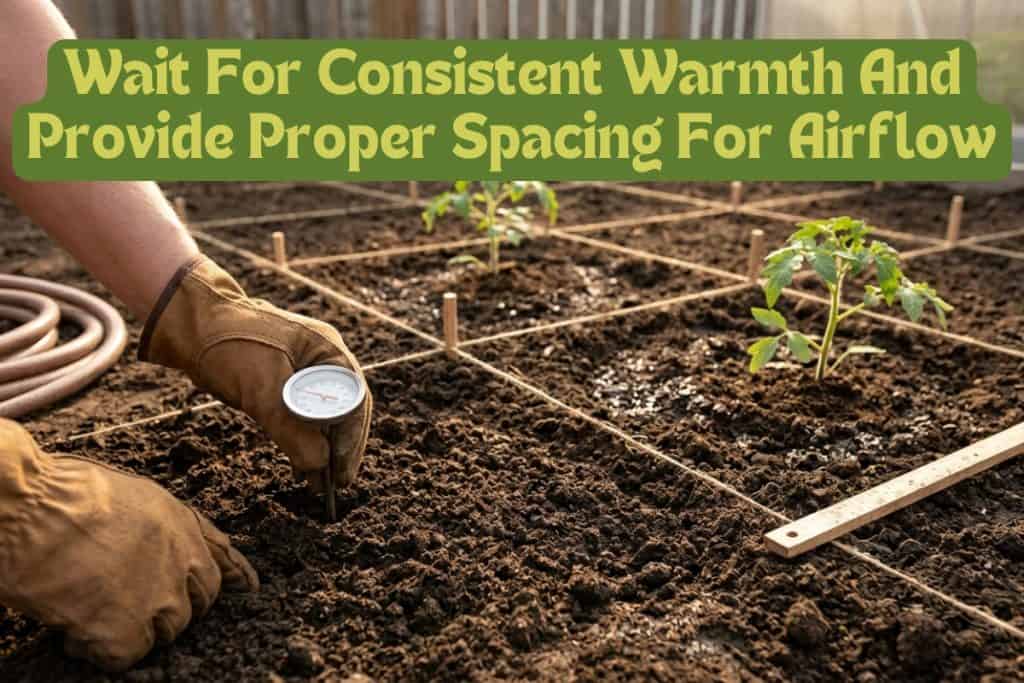
Wait until nighttime temperatures are consistently above 50°F before transplanting seedlings outdoors. The soil should be at least 60°F. In moderate climates, this is typically between late April and early June. In warmer climates, planting can begin as early as March.
To work out your indoor seed-starting date, find your last expected frost date and count back 6–8 weeks; that’s your target seed-sowing window.
Space Planning Before You Dig
Before you put a single plant in the ground, plan your layout. Proper spacing is one of your most effective defenses against fungal diseases, which thrive when foliage stays damp and airflow is restricted.
Use this as your spacing reference:
Planting Width
- Indeterminate varieties: 24–36 inches between plants; 3–4 feet between rows
- Determinate varieties: 18–24 inches between plants
- Container-grown: one plant per 12–16 inch diameter pot minimum
- Pattern: Grid or offset pattern, never straight lines back-to-back
Indeterminate varieties are especially vulnerable to disease from lack of airflow. Their continuous vertical growth creates a dense canopy by midsummer, which traps humidity.
Step #5: Planting Best Practices
Transplanting to the outside is a make-or-break moment for your crop. If done correctly, seedlings recover fast, root strongly, and grow vigorously. Wait too long, and the roots will be circling the pot and restrict growth even after they’re planted. Roots emerging from the drainage holes are a sign that they are ready to move outside.
Harden Off First
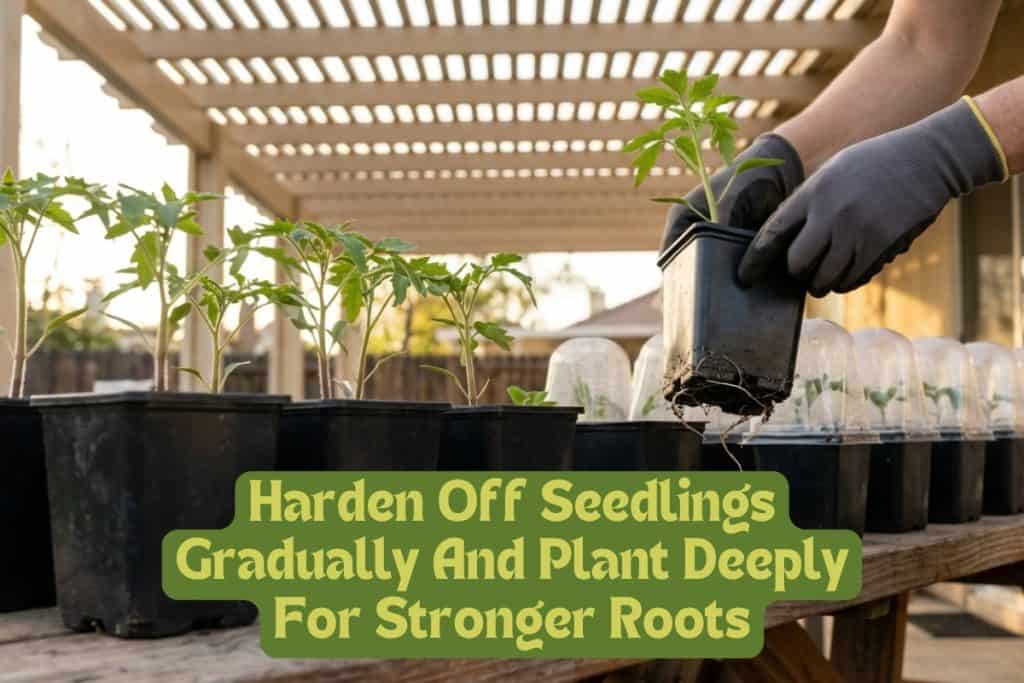
Before your seedlings go outside, they must be hardened off, a gradual acclimatization process that prevents transplant shock. Taking seedlings from a sheltered location and then subjecting them to bright sunlight and heat can cause leaf burn and stress that will be hard to overcome.
First, we will go through hardening off, then immediately follow up with planting.
5 Steps For Hardening Off
- Begin 7–10 days before your planned transplant date
- Start with 1–2 hours outdoors in a sheltered, shaded spot on day one
- Add 1–2 hours of outdoor time each subsequent day
- Introduce direct sunlight gradually from day four or five
- Leave out overnight only once nighttime temperatures are reliably above 50°F
Once your seedlings have been hardened off, grab your planting plan and follow these steps for final planting.
6 Steps of Planting
- Remove any leaves that would rest on the soil after planting.
- Slide out the root ball carefully; if roots are circling, gently tease them loose.
- Plant deep, burying a generous portion of the stem, or lay horizontal in a trench. Tomatoes will form roots along the buried stem.
- Backfill and press gently to eliminate air pockets around the roots.
- Water slowly and deeply immediately after planting.
- Add a ring of compost around the plant, away from the stem.
Step #6: Support Your Plants Early
Install your choice of support at planting time, not after the plant has started sprawling. Trying to put a cage over an established plant without breaking stems is an exercise in frustration.
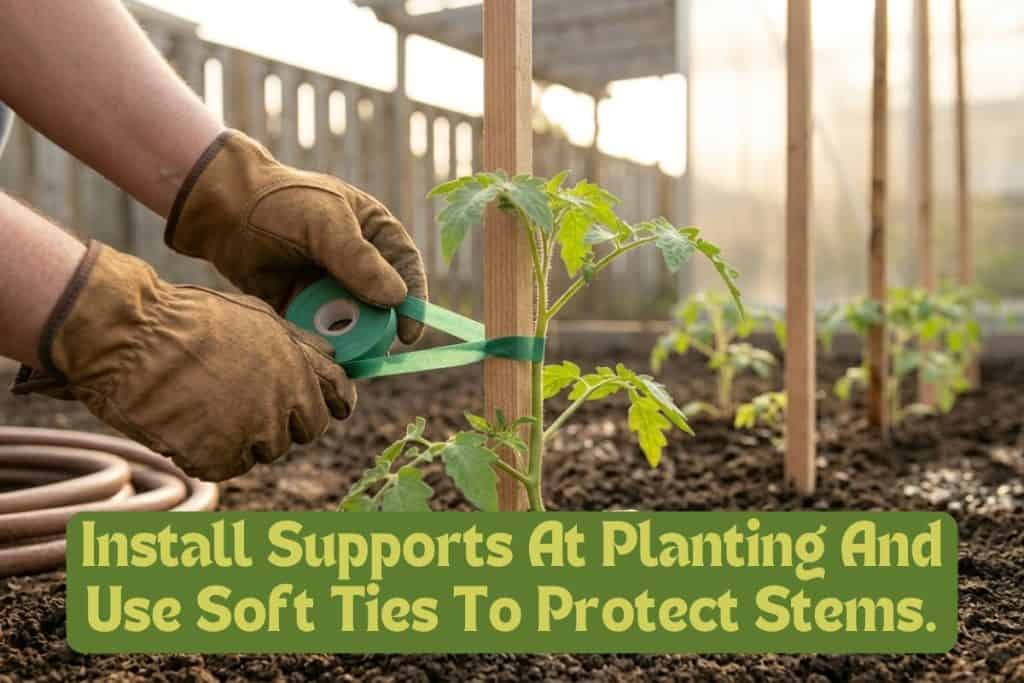
There are two types of green plastic tie material sold for attaching tomatoes to stakes. One type is designed to break before choking the stem, while the other—which sometimes contains wire—will not. Sometimes these even have a wire inside the tape. If considering plastic tape, be aware of which type you are buying to avoid problems later.
Some gardeners use a Florida weave system, running twine between posts along a row, which provides excellent support for multiple plants at a low cost.
4 Steps to Effective Plant Support
- Choose the right support type: cages for determinate, stakes or trellises 5-6 ft tall for indeterminate.
- Install when planting, before the plant begins to grow again.
- Use soft garden tape, Velcro, or cloth strips; never wire or tight plastic.
- Check ties regularly and adjust as stems thicken.
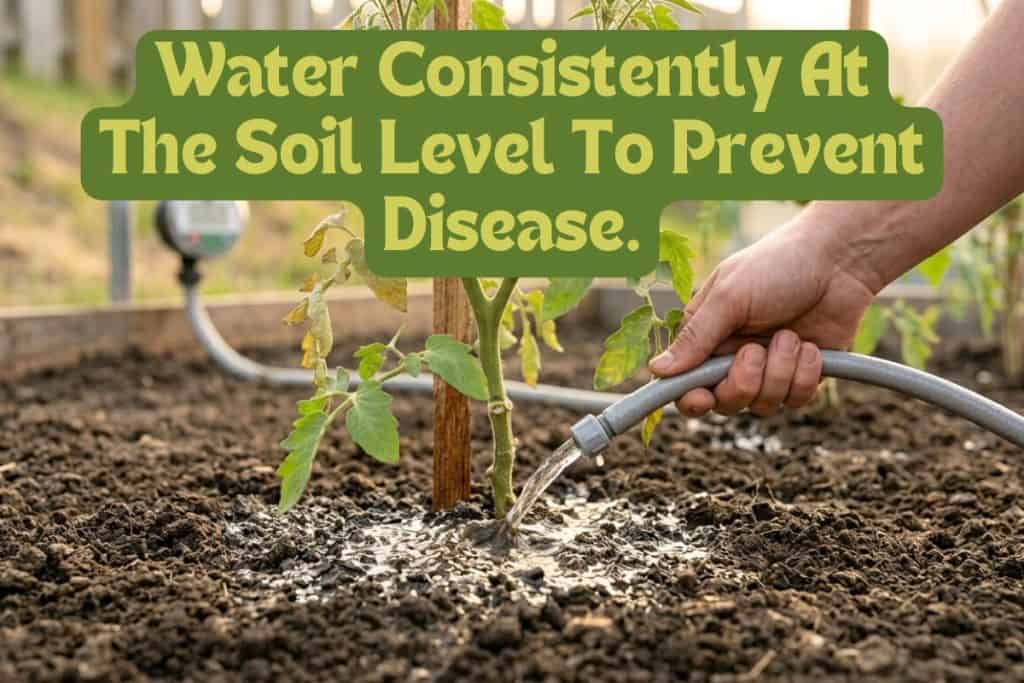
Step #7: Water at the Base
Consistent, deep watering at the base of the plant is important for preventing disease. If possible, install a drip irrigation system or use soaker hoses. For containers, there are micro-tubing kits that allow you to put an emitter in the line to match the locations of your pots. Consistency matters as much as volume.
In warm, dry conditions, established in-ground plants will typically need watering every two to three days. Container-grown plants dry out more quickly and may need daily watering.
The most reliable test is simple: push a finger 2 inches into the soil. If it feels dry, it is time to water. If using a watering system at the base, use a timer installed on your hose for consistency.
5 Steps For Proper Watering
- Always water at the base if possible.
- Aim for even, consistent moisture rather than irregular, heavy soakings
- Water in-ground plants every two to three days in warm conditions
- Check containers daily and water whenever the top 2 inches feel dry
- Water in the early morning so excess moisture evaporates before dark
Strawberries also demand this precise moisture level; I invite you to read how to grow juicy strawberries here.
Step 8: Mulch and Fertilizer
Once your plants are in the ground and watering is set, it is time for mulch and fertilizer, two of the most important care tasks. They are closely related, and together form the foundation of a productive, healthy plant.
A good layer of mulch conserves soil moisture, regulates soil temperature, suppresses weeds, and prevents soil-borne fungal spores from splashing onto leaves. Apply a 3-4 inch layer around each plant, keeping it a couple of inches clear of the main stem to prevent rot. The best mulching materials for tomatoes each have their strengths.
Best Mulching Materials
- Straw: light, clean, excellent moisture retention
- Wood chips: long-lasting; good for temperature regulation
- Compost: dual-purpose; adds nutrients as it breaks down
- Grass clippings: effective; apply in thin layers to prevent matting
Feeding works hand in hand with mulching. Put the fertilizer down before your first mulching.
Fertilizing Your Tomatoes
Your fertilizer strategy needs to shift as the plant moves through its growth stages. In the early vegetative stage, a balanced fertilizer (10-10-10) is appropriate. Once flowering begins, switch to a fertilizer higher in phosphorus and potassium to support flowering, fruit set, and flavor development.
5 Step Seasonal Feeding Program
- At planting, incorporate a slow-release balanced granular fertilizer into the soil.
- During early growth, apply a liquid balanced fertilizer every two weeks.
- Once the first flowers appear, switch to a high-potassium tomato fertilizer.
- During the fruiting stage, continue the high-potassium feed weekly until season’s end.
- If the plant shows signs of stress from heat, drought, or disease, resolve the issue before feeding.
Step 9: Pinching, Pruning, and Tickling
There are three important ongoing care practices that increase crop yields. Pinching, pruning, and “tickling” (stimulating pollination). Done consistently and correctly, pinching and pruning redirects the plant’s energy away from excessive foliage and toward fewer, larger, better-quality tomatoes. The two key pruning tasks are pinching suckers and removing lower leaves.
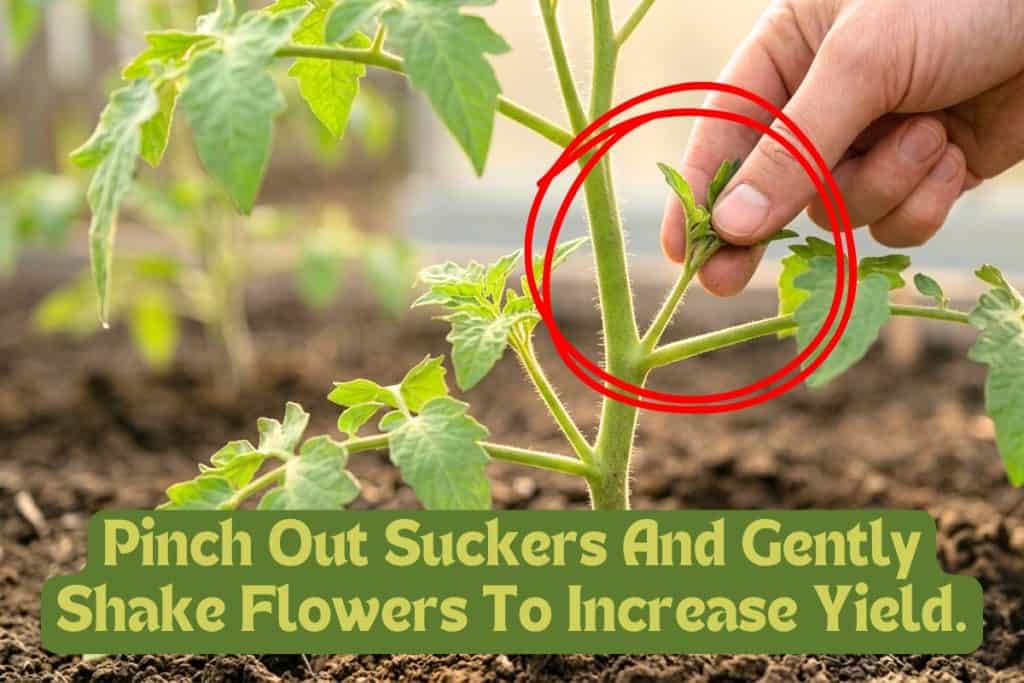
Pinching Out Suckers
Suckers are small shoots that emerge in the “V” junctions between the main stem and a side branch. Left unchecked, suckers will grow into a full branch, and the plant will waste energy on foliage.
Pinch them out when they are small, less than 1 inch, using your fingers or clean, sharp scissors. For indeterminate varieties, regular suckering throughout the season is essential.
Removing Lower Leaves
Besides pinching, the only other pruning you need to do is removing the lower leaves. This eliminates fungal spores in the soil from traveling upward. Use sharp tools and do not try to pull off the leaves; they will strip the stem. With indeterminate plants, you will need to do this several times.
5 Steps to Proper Pinching and Pruning
- Pinch suckers when small; don’t let them establish
- Remove leaves near the soil once the plant reaches 2 feet
- Work upward gradually; don’t strip the lower portion all at once
- Always prune on a dry day with clean, sterilized tools
- Never remove more than one-third of the total foliage in a single session
The Tickle Technique For Fruit Set
Tomatoes are self-pollinating, but in a sheltered environment without bees or wind, they often need a little help. Pinching and pruning creates more flowering, but those flowers still need good pollination. Even in favorable conditions, many experienced growers swear by a daily “tickle” for the best results.
A gentle shake of the main stem or a light tap on the flower clusters (trusses) is enough to release and transfer pollen. Do this in the morning when pollen is dry and most viable, using your fingertips, a soft paintbrush, or even an electric toothbrush.
Orchids require similar delicate attention to trigger blooms; check out our guide on how to care for orchids here.
Manage Pests and Diseases
Even the most attentive grower can encounter pest problems at some point during the season. The key is catching issues early and having a strategy in place before trouble arrives.
3 Most Common Tomato Pests
- Tomato Hornworm: large green caterpillar with a sharp horn
- Aphids cluster under leaves on new growth
- Spider mites: worse in hot, dry conditions; check for webbing
Hornworms look scary with their needle-like horns. Be brave and pick them off by hand and dispose of them before they eat all your leaves. You can spray neem oil to control aphids and spider mites. Add a drop of dish soap to the oil so it will stick to leaves longer.
Tomato Diseases
The most common fungal diseases affecting tomatoes are early blight, late blight, and Septoria leaf spot. All three thrive in warm, wet conditions and spread through crowded, poorly ventilated plants. All three begin at the bottom of the plant and work their way up, so keep those bottom leaves off.
Late Blight
Late blight is the most aggressive of the three and can devastate a plant within days. Removing and disposing of affected leaves at the first sign of infection slows the spread.
Nutrient and Physiological Issues
Blossom-end rot and catfacing are the main non-pest issues and the most talked-about problems tomato growers have. Both affect the fruit on the blossom end, and both are prevented with consistent moisture, restrained nitrogen fertilization, and not planting too early.
Blossom-End Rot
Blossom-end rot is usually a pH and watering-related issue. Calcium-related problems are often caused by calcium availability, not calcium content in the soil. Calcium is abundant in most soils, but if the pH isn’t correct, it isn’t available for roots to take up. Keep an eye on the pH.
Catfacing
Catfacing causes misshapen fruit with deep crevices and scarring. It is not a disease, but a stress response triggered by cold temperatures below 50–60°F during flowering, excess nitrogen, and the same moisture fluctuation problem as BER.
Companion Planting (Natural Deterrents)
One of the most effective and low-effort pest deterrent strategies is companion planting, placing certain plants near your tomatoes to deter pests, attract beneficial insects, or improve overall growing conditions.
The concept works on several levels all at one time. Some plants confuse or repel pests through scent; others lure in predatory insects that keep pest populations in check, and some simply draw pollinators.
Strategic placement also matters. Companions work best when planted close enough to do their job, not simply somewhere nearby. Plants to avoid near tomatoes include brassicas, fennel, and corn, all of which compete aggressively or harbor shared pests.
5 Top Plants For Companions
- Basil: Repels aphids, whiteflies, and thrips
- Marigolds: Attracts aphid-eating predatory insects; roots deter nematodes
- Borage: Draws parasitic wasps that target tomato hornworm larvae
- Nasturtiums: Lure aphids away from your tomatoes
- Chives and garlic: Actively deter aphids and hornworms
Harvest at the Breaker Stage
Most people wait for tomatoes to ripen fully on the vine, but experienced growers harvest at the breaker stage, the point where at least 10% of the fruit shows yellow, orange, or reddish color. Once a tomato reaches this threshold, it has already developed its full sugar and flavor profile and no longer needs the vine to ripen indoors.
Advantages of Breaker Stage Harvesting
Harvesting early reduces the plant’s energy spend, helping remaining fruit develop, and protects your crop from pests and rain-induced cracking. It also prevents the “all-at-once” ripening rush, allowing you to manage your harvest more easily.
5 Steps to a Successful Harvest
- Monitor Daily: Check plants daily once fruit reaches full size and initial color appears.
- Harvest Early: Pick at the breaker stage (10% color change) for top quality and plant protection.
- Time it Right: Harvest in the cool of the morning while the fruit is firm.
- Use Proper Technique: Secure the stem with one hand and gently twist the fruit with the other to avoid plant damage.
- Ripen Indoors: Finish ripening at room temperature, out of direct sunlight—never refrigerate.
Final Advice For Success
Growers who produce the best tomatoes every year are not those with expensive or elaborate systems. They are the ones who pay attention, who notice a yellowing leaf before it spreads, who water consistently, and who check their plants regularly. Attention and follow-up are your most powerful growth tools.
I suggest starting with one or two reliable varieties. Build your habits and get to know how your location works for tomatoes including the light, the drainage, any negative issues. Then go from there. Your knowledge and harvest will increase every year.
Happy Growing!
References
- University of New Hampshire Extension – Growing Vegetables: Tomatoes
- University of Maryland Extension – Growing Tomatoes in a Home Garden
- Colorado State University Extension – Growing Tomatoes
- North Carolina State Extension – Growing Tomatoes at Home


11 thoughts on “9 Simple Steps to Growing Professional-Quality Tomatoes at Home”
The leaves on top of one of my tomatoe plants are small and curly do you know what I can do for it
Hi, it could be several things, but must likely stress from temperature and water flucuation. It hasn’t really gotten hot and dry in most areas and weather has been inconsistant in most areas. Make sure your pot is draining well and it isn’t staying too wet. Thrips can cause leaf curing, so to check use a white piece of paper and put it under some leaves while you shake the leaves. Look to see if anything is crawling around on the paper. Thrips are tiny and slender. If you see any red spots, brush your finger over them and see if it smears. If it smears, those are spider mites. Just do your best to keep things consistent as possible.
Can I plant tomatoes in pots in raised garden soil?
Absolutely you can grow tommatoes in pots and use raised garden soil. I have about 20 tomatoes in fabric grow bags with raised garden soil. It will have some slow release fertilizer in the mix, but you can still add some more tomtato specific or fish emolsion liquid later in the season.
Mostly a flower gardener, my tomato garden is next door to the Chesapeake Bay in Virginia. Now I know what I have done correctly and all the things I need to change!
Most people who read this are beginners and may not understand the jargon. I had to use the dictionary three times. Maybe dumb it down for people who aren’t agriculturists.
Thank you for your suggestion. I appreciate it.
If you cannot get a soil test, how is best to know whether add lime or not.
Can blossom end rot be deterred or illuminated?
Thank you.
Without a soil test, you can’t know if your pH is off, so there is no way to know if you need lime. You could be making things worse. You can use a $5 pool water test kit if needed. You can work in some calcium, crushed egg shells, or antacids, like Tums, into the soil just in case you have a calcium defiency which would help with blossom end rot if your pH is ok.
I love the Tums trick
This works very well and you can go to your local land conservation agency to get free help. I grow hydroponic way and plant both ways in dirt and hydroponic way. I can push them the way I want high yealds and great jucy tomato taste.
Good luck!
Joe