
Somewhere, an orchid is being killed with kindness — overwatered, fussed over, and loved into an early grave. Sound familiar?
Good news! Orchids are remarkably forgiving once you know their quirks. This guide covers everything from choosing the right plant to coaxing it back into bloom, with zero judgment for past orchid casualties. Let’s turn that reputation around.
In this guide, you’ll learn:
- Why many orchids die (and the simple fix)
- The light, temperature, and humidity your orchid is secretly craving
- When to repot, fertilize, and prune, and when to leave it alone
- How to wake a dormant orchid up and get it blooming again
You’ll discover the essential steps, checklists, and tricks you need to keep your orchids healthy for years.
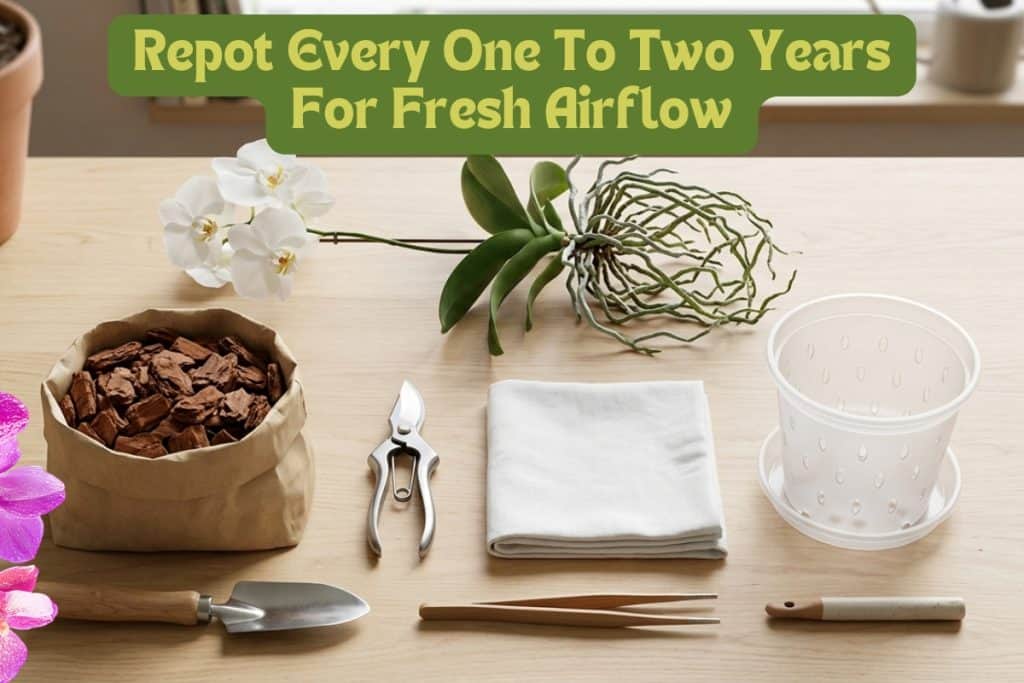
Supplies You’ll Need
Gather these simple supplies for healthy growth and beautiful blooms.
- Pot with drainage holes
- Orchid potting mix, sphagnum moss, or fir bark
- Balanced orchid fertilizer
- Bamboo stake and soft orchid clips
- Pruning shears or scissors
- Digital hygrometer (not vital but helpful)
Tip #1: Light Basics

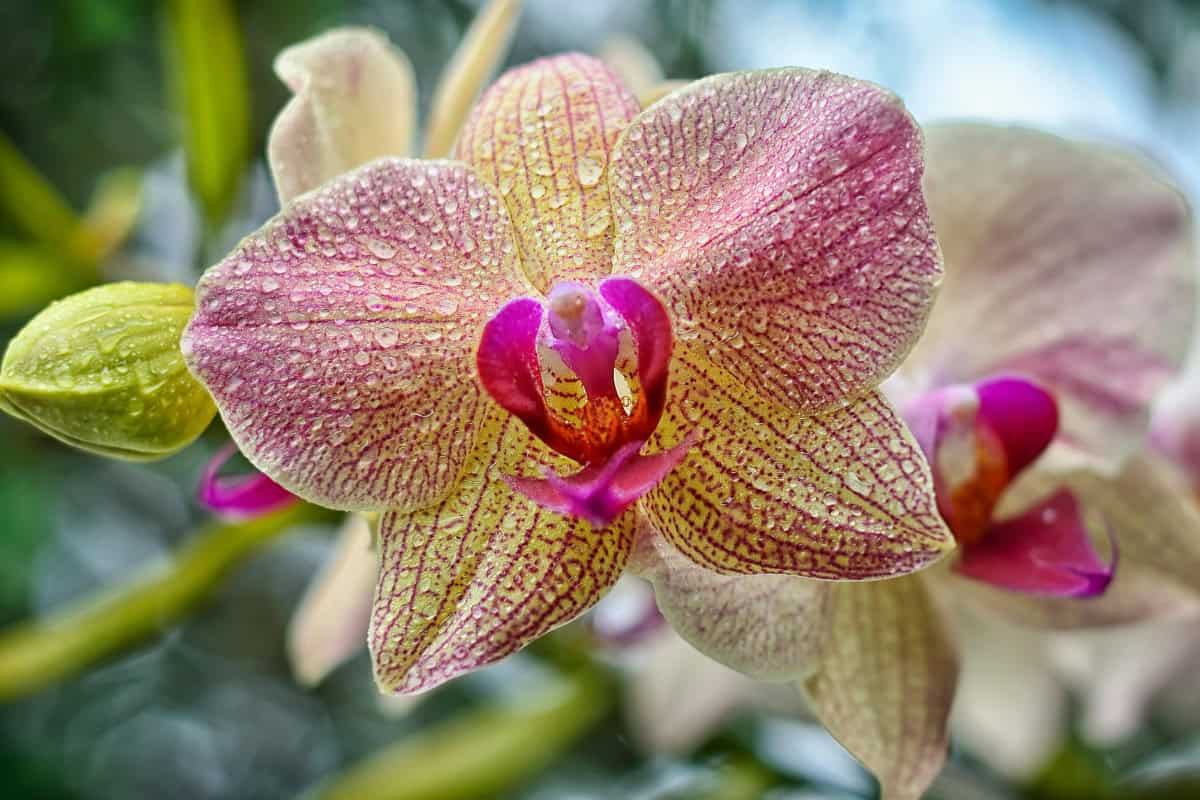
Orchids belong to one of the largest plant families on Earth, with over 25,000 species and more than 100,000 registered hybrids, but most orchids sold at grocery and big box stores are Phalaenopsis (moth orchids).
In the wild, these plants don’t grow in soil; they cling to tree bark under the canopy of tropical forests. This means they are adapted to filtered sunlight, plenty of air moving around their roots, and cycles of heavy rain followed by dry periods.
Quick Reference for Orchid Lighting
- Ideal placement: East-facing, or south/west window with a sheer curtain
- Light duration: 12–14 hours of bright, indirect light per day
- Too much light: Yellowing, bleached, or reddish leaves
- Too little light: Dark green, limp leaves; healthy foliage but no blooms
- Rotate: Turn your plant a quarter turn every few weeks
When you bring an orchid home, your first job is to mimic that dappled forest lighting. The right placement is the difference between a thriving plant and one that slowly fades away.
You want bright, indirect light. Direct, harsh sunlight will physically burn the leaves, while too much shade will slow growth and prevent future blooms. If you don’t have a bright window, an inexpensive broad-spectrum LED light will be enough light to keep it healthy.
Since strawberries also require specific light to fruit, I invite you to read our guide on growing sweet, juicy strawberries at home here.
Tip #2: Watering (Less Is More)

Overwatering kills more orchids than anything else.
Orchids evolved in environments where roots dry out between rains; they simply can’t tolerate constant moisture. Soggy roots break down fast and develop rot. The most important skill you can build is learning to water based on plant needs, not a calendar.
A very popular, yet wrong, common watering technique is to place ice cubes on the base of the plant. The cold can hurt the roots and cause shock so avoid this bad practice and use warm or room temperature water.
Watering Method by Potting Medium
There is no single schedule that fits every situation, so always confirm by checking roots and medium rather than counting days.
- Bark (average home): Every 7–10 days; every 3–7 days in a hot or dry environment.
- Sphagnum moss (average home): Every 10–14 days; every 7–10 days in a warm or dry environment.
- Mounted plants: Light misting daily, or a full soak 2–3 times per week.
The easiest way to read your plant is root color. A clear nursery pot lets you see this in real time. Silvery-gray roots mean it is time to water. Plump, bright green roots mean the plant is fully hydrated.
Choosing the Right Water
Water quality matters as much as frequency. The wrong source causes long-term mineral damage to roots and medium.
Stick to low-mineral sources; rainwater, reverse osmosis (RO) filtered water, or distilled water are all ideal choices. Tap water is acceptable if your supply is soft. Hard water, high in calcium, magnesium, and salts, will leave white or brown crusts on roots and medium over time.
7 Step Watering Procedure
- Use room-temperature water, roughly 68–78°F.
- For sphagnum moss, run water through for 15–30 seconds until thoroughly saturated; do not soak.
- For bark or bark-heavy mix, run water for 3–4 minutes, or soak for 5–10 minutes, never longer.
- Flush every 1–3 waterings by pouring twice the pot volume through to leach accumulated salts.
- Drain completely; never leave the pot sitting in standing water.
- Wipe any water from the crown and leaf folds to prevent crown rot.
- Return the plant to a well-ventilated, bright spot.
Pro Tip: After repotting, wait 2–3 days before the first watering to allow any cut surfaces to callus and dry.
Tip #3: Humidity & Airflow
Orchids are tropical plants and love humidity.
The dry air in a typical home, especially during winter when heaters are running, can cause buds to blast (shrivel and drop off before opening) and roots to dry out too quickly. Ideally, you want to aim for 50% to 70% humidity around your plants.
However, high humidity without airflow is a recipe for disaster. Stagnant, damp air invites fungal infections, mold, and rot. You must counterbalance moisture with movement. A simple ceiling fan on low or a small oscillating fan placed across the room provides the gentle breeze these orchids crave.
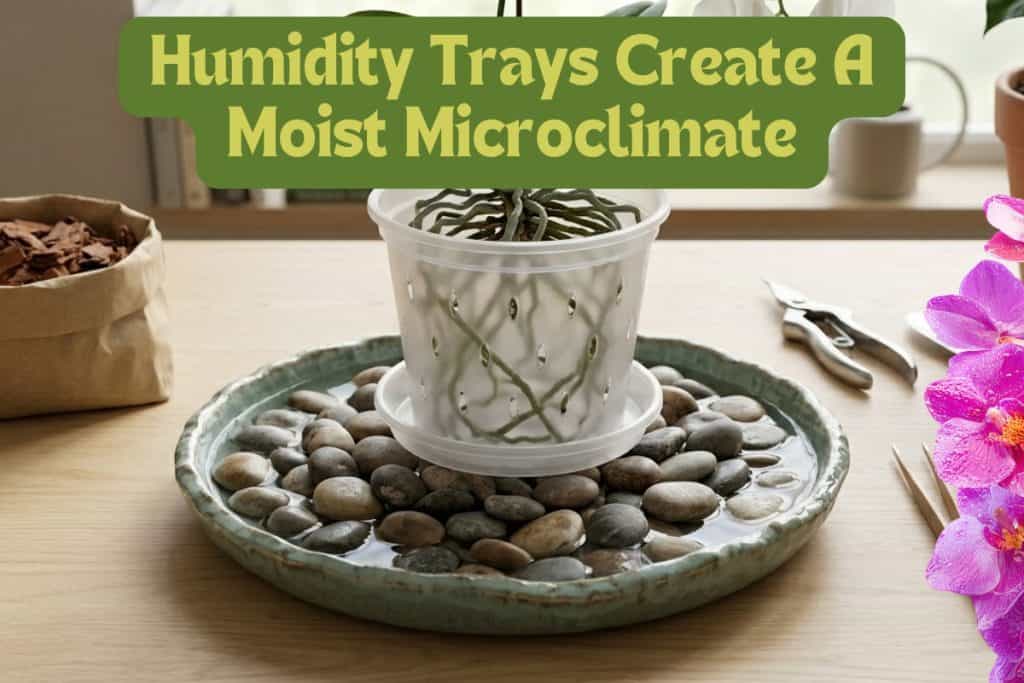
3 Ways to Increase Humidity
- Humidity trays (Pebble trays): Fill a shallow tray with pebbles and water, then place the orchid pot on top of the pebbles. Ensure the bottom of the pot stays above the water. As the water evaporates, it creates a microclimate of humidity.
- Grouping plants: Plants naturally transpire (release water vapor). Grouping your orchid with other humidity-loving houseplants, creates a shared, slightly more humid canopy. Because they share tropical humidity needs, check out our guide on how to grow an avocado from seed here.
- Using a room humidifier: This is the most effective and reliable method, especially in very dry climates. Place a small cool-mist humidifier a few feet away from your orchids.
Tip #4: Temperature
If you are comfortable in your home, your Phalaenopsis orchid is probably comfortable, too. They thrive in standard indoor temperatures, generally between 65°F and 85°F during the day and 55–70°F at night.
Importantly, the difference between day and night temperatures is just as important as the temperatures themselves. The natural drop of 10–15°F in the evening is one of the primary triggers that initiates flowering in the fall.
What they don’t like are sudden, extreme shifts. Keep them away from drafty windows in the winter and ensure they aren’t sitting directly in the path of air conditioning vents or radiators.
4 Signs Your Orchid is Too Hot or Too Cold
- Leathery, wrinkled leaves: heat stress causing rapid dehydration.
- Soft, mushy spots on leaves: cold damage, often from a freezing windowpane.
- Bud blast (dropping unopened buds): triggered by sudden temperature swings
- Stunted, slow growth: the environment is constantly too cold
Tip #5: Potting Medium (No Soil)

Never put an orchid in regular potting soil. Traditional potting media will suffocate orchid roots within weeks, leading to severe rot and plant death. Instead, orchids require a specialized, airy medium that provides structure, holds just enough moisture, and allows oxygen to flow freely to the roots.
While orchids hate traditional dirt, see our guide on 8 essential steps to growing your best potato crop here.
Your choice of medium should dictate your watering habits, not the other way around. The two most common options are bark and sphagnum moss, and both have distinct advantages depending on your home’s climate.
Bark vs Sphagnum Moss
Choosing between bark and sphagnum moss comes down to how often you water and how much moisture your orchids need to thrive.
Orchid Bark (Fir or Pine):
- Best for: Heavy hand-waterers, humid environments
- Pros: Excellent drainage, maximum airflow.
- Cons: Requires more frequent watering, breaks down faster
Sphagnum Moss:
- Best for: Forgetful waterers, very dry homes
- Pros: Holds water like a sponge, neutral pH
- Cons: Very easy to over-water, compresses over time
Other Orchid Media
Bark and sphagnum moss are the primary media, but there are other popular choices. Specially blended orchid mixes are readily available. Mixes usually contain both bark and moss, along with perlite, coco coir, and sand.
LECA (Lightweight Expanded Clay Aggregate), small porous clay balls, are also used and offer the same advantages of bark. It also holds nutrients better than bark, and absorbs moisture, allowing watering from the bottom.
Pro Tip: “Add a small amount of horticultural charcoal to your potting mix to neutralize salt buildup and reduce bacterial and fungal growth.”
Tip #6: Repotting Steps
Repotting can be intimidating, but it is entirely necessary for long-term health.
Over time, bark breaks down into mush, and moss compresses into a dense block. When this happens, the medium turns acidic and cuts off oxygen to the roots. You should generally plan to repot your orchid every one to two years, or immediately if you notice the medium has broken down.
Other signs it is time to repot include roots growing wildly out of the pot, or if the plant has become top-heavy and is tipping over. Try to wait until the plant has finished blooming to avoid shocking it into dropping its flowers.
Choosing the Right Pot
Choose a pot with large drain holes for the best drainage. Do not over-pot. Orchids often bloom best when slightly pot-bound. A transparent pot lets you easily monitor root health.
Expect a recovery window of 2–8 weeks before new fine root growth is visible, and several months before new flower spikes may appear. Do not rush back to a heavy feeding or watering schedule.
10 Steps For Successful Re-potting
- Sterilize your cutting tools (scissors or shears) with rubbing alcohol or 10% bleach. This prevents the spread of viruses.
- Gently squeeze the sides of the plastic pot to loosen the roots, then slide the plant out.
- Carefully untangle the roots and remove all the old potting medium. Rinse them under lukewarm water.
- Trim away any dead, hollow, or mushy roots. Healthy roots will be firm (either green, silver, or pale yellow).
- Soak the roots for 10 minutes, keeping the crown above the waterline. Wipe down the leaf surfaces.
- (Optional) Some expert growers use a mild, natural garlic soak at this stage as a gentle antifungal treatment before potting. To understand the properties of this antifungal plant, read our simple guide on how to grow garlic plants here.
- Dry with a soft cloth. Set the orchid in a cool, airy spot out of direct sun for 24–48 hours to callus.
- Hold the orchid so that the crown is level with or slightly above the rim of the pot.
- Gently work your new bark or moss around the roots, tapping the side of the pot to settle the pieces.
- Give the plant 2–3 days to rest before its first watering.
Tip #7: Fertilize (Light & Regular)
Orchids are light feeders by nature. Fertilizing regularly at a reduced rate, known as “weakly weekly,” is the best approach. Heavy feeding risks burning sensitive roots and encouraging salt buildup.
The NPK ratio (nitrogen, phosphorus, and potassium) should be matched to your orchid’s current growth stage:
- High nitrogen (30-10-10): Active growing season in spring and summer.
- Balanced formula (20-20-20): Suitable year-round.
- High phosphorus (10-30-20): Late summer through fall to support bloom development.
As your orchid approaches its blooming season, switching to a high-phosphorus bloom booster encourages flower spike development over leaf and root growth. Once buds appear, ease back on feeding altogether; pushing nutrients while the plant is actively blooming can shorten the life of your flowers.
Always dilute to one-quarter of the label’s recommended dose and apply to moist roots only, never to a dry plant. When choosing a fertilizer, a urea-free liquid formula is the preferred choice, as orchid roots absorb it directly and efficiently.
Slow Release
If this routine doesn’t suit your schedule, slow-release granular orchid fertilizers are a convenient alternative. These come in different formulations and release nutrients gradually over several weeks, making them a better option for lower-maintenance growers.
Natural Fertilizers
Many growers make their own natural orchid fertilizer. One popular recipe combines a banana with ginger tea. The banana supplies potassium, phosphorus, magnesium, and trace elements, while the ginger adds antimicrobial properties.
Tip #8: Pruning
Pruning an orchid is mostly about cleanup. Unlike shrubs or fruit trees, you don’t prune orchids to shape them. You prune them to remove dead tissue, redirect energy, and prevent disease. The most common question is what to do with the flower spike once the blooms have fallen off.
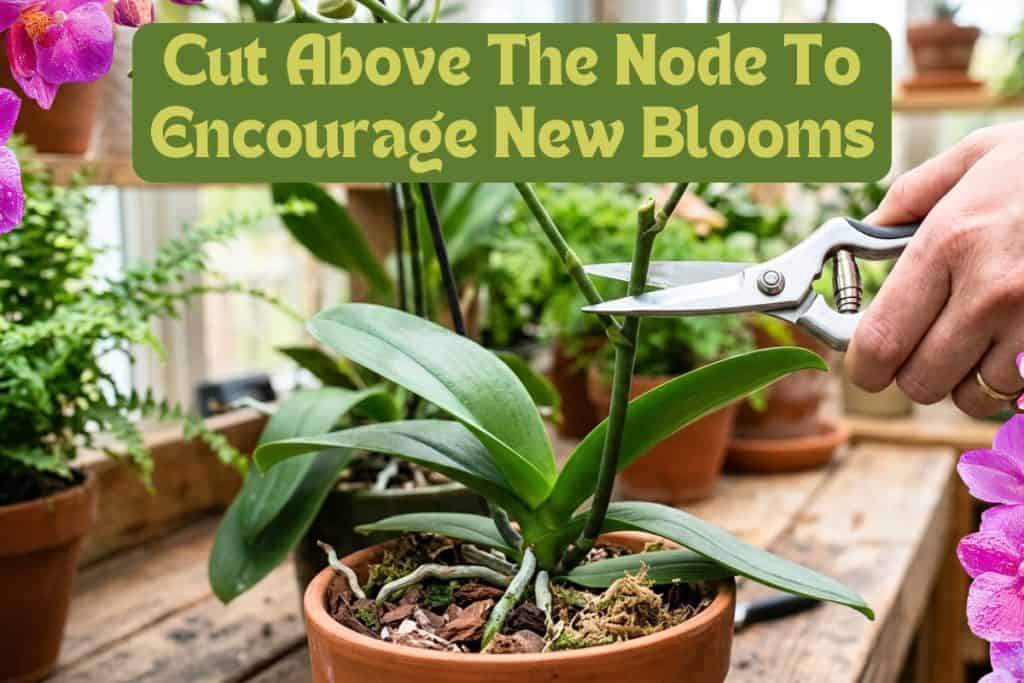
Look closely at the spike, then follow this guide:
- Fully brown or dried spike: cut it down to the base of the plant
- Green but spent spike: cut back to just above a visible node; a secondary branch may produce flowers
- Active spike with buds: never cut a spike that is actively developing or still carrying open blooms
Always sterilize your cutting tools with rubbing alcohol or a flame before making any cuts. Plant viruses spread easily through shared sap. After any significant pruning, give the plant a few days before fertilizing to allow cut surfaces to heal and reduce the risk of chemical irritation on fresh wounds.
Pro Tip: “Seal large cuts with ground cinnamon, which acts as a natural antifungal, or a commercial orchid wound sealant.”
Tip #9: Pests & Diseases
Even well-kept indoor orchids can fall victim to pests. The warm environment and lack of predators can allow pest populations to build up fast.
The key to managing insect infestations is to catch them early before the population explodes. Check your plant thoroughly every time you water, looking under the leaves and deep in the crevices near the crown.
Common Insects and Solutions
- Mealybugs: white, cottony clusters; treat with 70% isopropyl alcohol on a cotton swab
- Scale: small, oval, shell-like bumps on stems or leaves. Treat with oil or systemic insecticides.
- Spider mites: cause stippling or webbing; increase humidity and use insecticidal soap
Diseases
The most common diseases are fungal and bacterial rots from improper watering. Keep your growing area clean by removing spent blooms and yellow leaves promptly.
Crown rot occurs when water sits at the base of the leaves, turning the base black and mushy. Root rot happens beneath the surface. The best treatment is prevention. Water carefully, ensure good airflow, and never let the plant sit in water.
Pro Tip: “Quarantine new plants for at least two to three weeks before placing them near your existing plants and monitor them closely for issues.”
Tip #10: Dormancy & Reblooming
A healthy orchid bloom can last anywhere from 2 to 4 months under good conditions. Many new owners throw their orchids away when the flowers drop, mistakenly believing the plant is dead.
In reality, it is just entering dormancy. Phalaenopsis orchids need a rest period to grow new leaves and roots and store energy for the next blooming cycle. This vegetative phase can last anywhere from six to nine months.
During dormancy, continue your regular watering and feeding routine, but scale back fertilizing to once a month. The foliage should remain firm, green, and healthy throughout dormancy. If leaves are yellowing, that is a sign of a care issue, like over-watering.
6 Steps to Encourage Orchids to Re-bloom
Most indoor orchids bloom annually or several times per year if conditions are favorable. To encourage re-blooming:
- Reduce night temperature slightly (down to mid-50s–low 60s°F) for several weeks; orchids set flower spikes after cooler nights.
- Create mild drought stress by lengthening the interval between waterings for a short period once leaves are fully mature.
- Provide steady, indirect light and continue light fertilization when new growth appears.
- Once you see the new green mitten-shaped tip of a flower spike emerging from the base of the leaves, you can return the plant to its normal temperature.
- When a spike first emerges, resist the urge to move or rotate the plant. Moving mid-development causes twisting and contortion.
- When a spike has finished blooming, you can either remove it entirely at the base or cut above a healthy node.
Final Advice
You are now equipped with the information you need to keep an orchid healthy and blooming. The secret isn’t having a green thumb; it’s just knowing what your plant actually needs instead of what you thought it needed. Stick to the basics and don’t panic if your plant looks a little rough. Orchids are survivors, just review this guide for solutions.
Start with one healthy Phalaenopsis orchid, get comfortable with its rhythms, and let your collection grow naturally from there. The learning curve is shorter than you think.
References
- American Orchid Society: Primary care standards.
- Smithsonian Gardens: Tropical habitat replication.
- Royal Horticultural Society (RHS): Watering and blooming cycles.
- University of Florida (IFAS): Media and nutrient science.
- Iowa State University Extension: Troubleshooting and stress.


10 thoughts on “How to Care for Orchids So They Bloom Every Year”
This was a great article, thanks for the info. I nursed a few back to health but had no idea what I was doing. Somehow I ended up with three incredible orchids. If I want to move them into/onto a tree, what is the process for that?
First be sure you are in a growing zone where it won’t freeze. Also you need regular rain and humidity. Start by gradually acclimating the plant to outdoor conditions for a few hours each day over one to two weeks. Choose a tree with some shade and good air circulation, and attach the orchid securely to the trunk or a sturdy branch using soft ties or fishing line, keeping the roots snug against the bark. Putting it in the crotch of a tree with its pot media would be easiest and most likely to succeed. Make sure the orchid is positioned where it will be sheltered from strong wind and direct midday sun, and continue regular watering.
I have a lot of roots coming out of my orchid pot. Light green in color.
What Should I do?
It is common for roots to be coming out of the pot, and the color sound like they are healthy. I would go ahead and repot them into a little bigger pot to handle those roots. Be sure to use orchid soil mix.
If the bottom leaves turn yellow what should I do
If it is just 1 or 2 bottom leaves it might just be natural aging. As you put on new leaves, the old one eventually die. If that is the case just leave them and let them fall off naturally. Cut off it after they mostly died down if you can’t wait. It could be over watering or underwatering. The main issue people have, is overwatering. Check the roots, if they are brownish, you are overwatering. If they are white and healthy, water more. If they are yellowish, try moving to less light. If they have been next to a window, they may have touched a cold windown pane. Just think through these things and you will have your answer.
Learned a lot from this. I do have a question that I hope someone can answer. During an ice storm, our house was about 35 degrees for a week while we had no power. My houseplants did not go with us when we left for a warmer place to stay. I lost the new growth on my orchid and now the old leaves are looking poor. I’m going to clean and repot but want to know if I’m wasting my time.
This Article was very informative . I’m a first time at taking care of orchids. And I was happy to read your article, step by step I followed your instructions, so now I’ll place them by the window and will watch them bloom.. Thank you for helping us new to growing orchids One thing I looking for and failed to see, How to clean the leaves,
Thank you for your comments. If your orchid is just dusty, use a soft cloth and just wipe it off. If it has water spots, use a damp cloth or paper towel or you can use some diluted lemon juice, it will help get the mineral spots off the leaves. Best wishes.
This was very informative. Thank you