
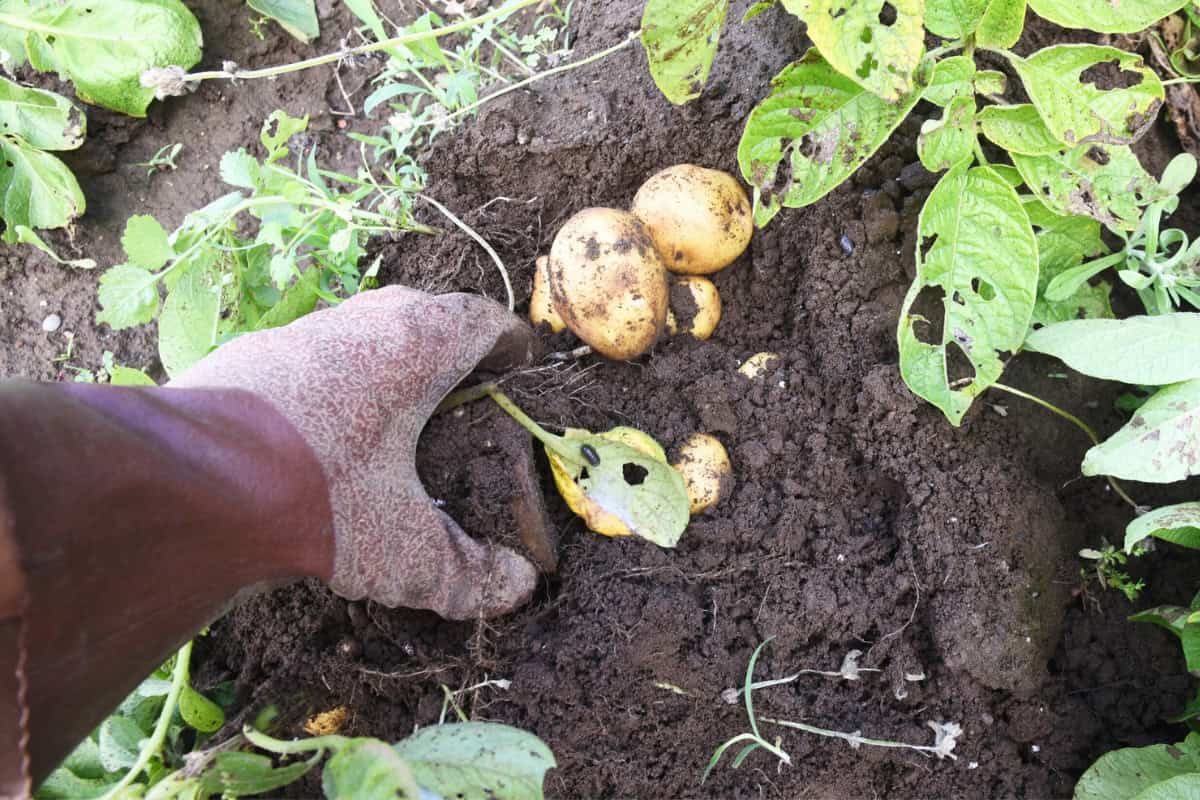
I have always loved digging potatoes! Potatoes are one of the most productive and rewarding crops you can grow. They thrive in many different climates, do well with a little care, and reward you with a surprisingly big harvest for the space they take up.
Great potato harvests don’t just happen on their own. Potatoes have their own needs, and knowing what they require—and when—can turn an average crop into an amazing one.
In this guide, we’ll cover how to:
- Pick the perfect seed varieties.
- Boost yields with expert chitting.
- Master the art of hilling.
- Water consistently for better tubers.
- Cure harvests for long-term storage.
This guide walks you through every stage of that process from selecting your seed to pulling the last tuber out of storage.
Your Potato-Growing Toolbox
To get your potato patch started, you’ll need a few essential tools:
- Certified disease-free seed tubers
- Sunny, well-drained garden space
- Sharp, clean knife for cutting seed pieces
- Compost or balanced fertilizer
- Watering hose (soaker hoses preferred)
- Flat-tined potato fork (or similar)
- Air/Soil Thermometer (optional but helpful)
Gather these supplies before planting to streamline the process from soil prep to hilling.
Step #1: Start With the Right Seed Potatoes
A productive potato crop is based on high-quality planting material. Always start with certified seed potatoes, tubers that have been inspected and certified free of major diseases.
Grocery store potatoes are not a reliable substitute. They are usually treated with sprout inhibitors for longer storage life, and are not inspected for the diseases we want to avoid.
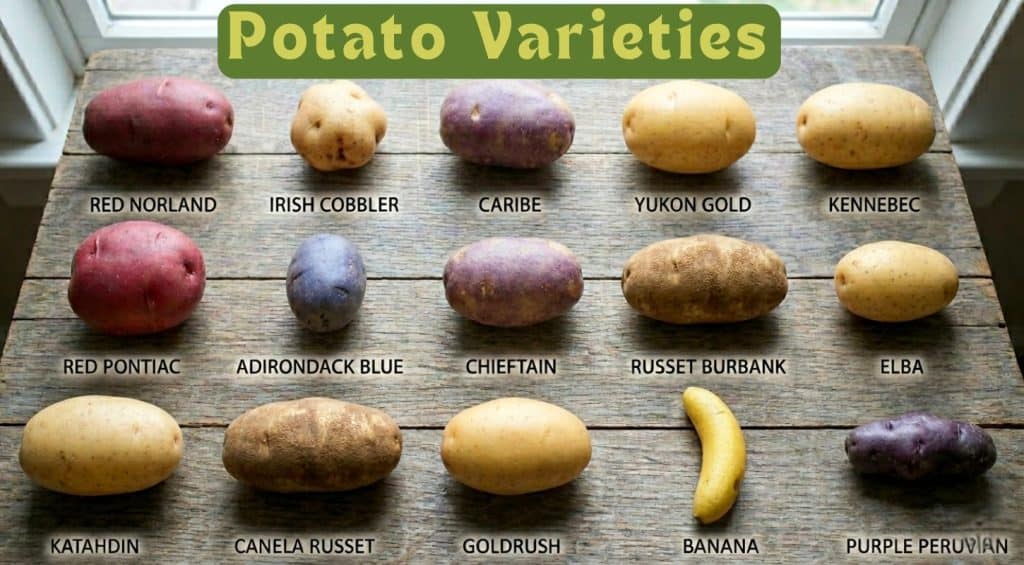
Here’s how different varieties line up by harvest time:
- Early-season (60–80 days): Red Norland, Irish Cobbler, Caribe, Yukon Gold
- Mid-season (70–90 days): Kennebec, Red Pontiac, Adirondack Blue, Chieftain
- Late-season/storage (90–110+ days): Russet Burbank, Elba, Katahdin, Canela Russet, Goldrush
- Specialty/fingerling (90–125 days): Russian Banana, La Ratte, Purple Peruvian
When selecting potato varieties, match the type to your intended use and length of growing season.
Look for firm, healthy tubers with tight skin and well-developed eyes. Reject anything soft, shriveled, showing scab lesions, discolored at the stem end, or black inside when cut.
Step #2: Pre-Sprouting Seed Potatoes (Chitting)
Chitting, or pre-sprouting seed potatoes before planting, gives your crop a significant head start. This is particularly useful in short-season climates or when you want the earliest possible harvest.
Plan to begin the process 3–6 weeks before your target planting date.

Not every variety requires chitting, but it is strongly recommended for early-season types and anyone looking to shave one to two weeks off your harvest date.
We want to create short, stocky, dark green sprouts. Long, pale sprouts signal too much warmth or darkness and will break off easily during planting and slow early establishment considerably.
4 Steps to Chitting
- Prep: Place tubers in a single layer in shallow trays or egg cartons, eye-end up.
- Storage: Store in a cool, bright location at 50–60°F . A north-facing window or cool greenhouse shelf works well.
- Sun: Keep them away from direct sunlight, which can dry out or overheat the tubers.
- Sprouting: Allow 3–6 weeks for sprouts to develop to approximately ½ to 1 inch in length.
Step #3: Cutting and Healing Seed Potatoes
Seed potatoes smaller than about 1.5–2 oz, roughly golf ball size, can be planted whole. Larger tubers should be cut into pieces to stretch your seed stock further and encourage stronger, multi-stemmed plants that produce more tubers per hill.
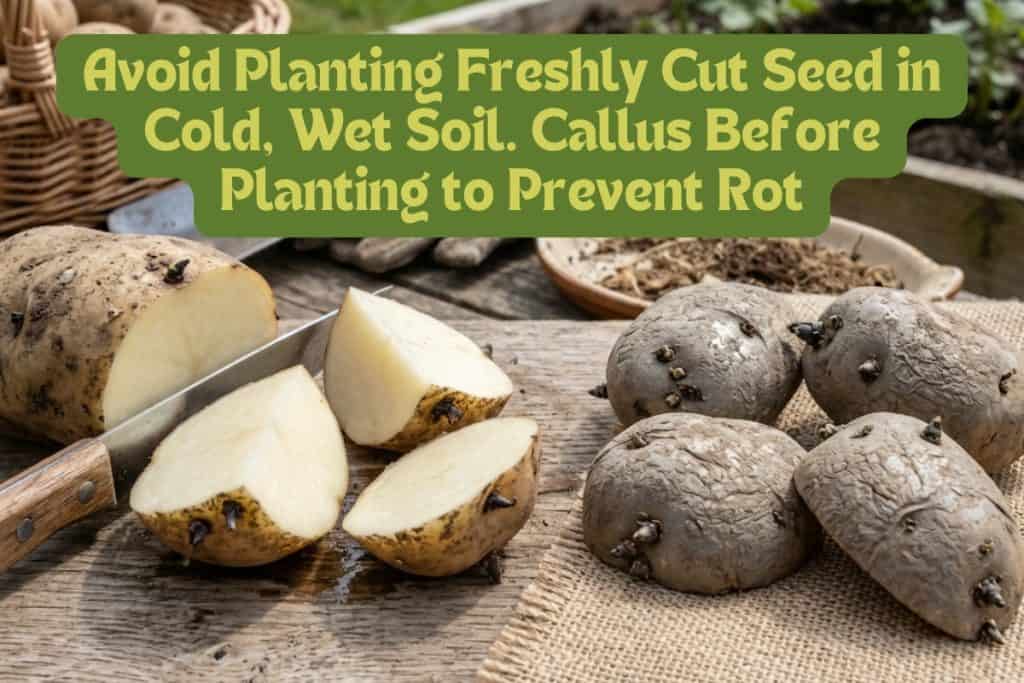
After cutting, spread the pieces in a single layer in a cool, dry area and allow them to rest for 24–48 hours. This allows cut surfaces to callus over, forming a protective barrier against disease.
Never plant freshly cut seed into cold, wet soil. Without a proper callus, rot can set in before the plant has a chance to establish.
4 Steps To Cut Seed Potatoes
- Clean Tools: Use a clean, sharp knife, and sanitize the blade between each cut using a 10% bleach solution or 70% isopropyl alcohol.
- Include Healthy Eyes: Cut each piece to include at least 1-2 healthy eyes. Two eyes consistently outperform one.
- Make Clean Cuts: Make deliberate clean cuts, as ragged, torn surfaces increase the risk of disease.
- Optional Disease Protection: In heavy soils or cool wet springs, dust cut surfaces lightly with sulfur powder for an added layer of disease protection.
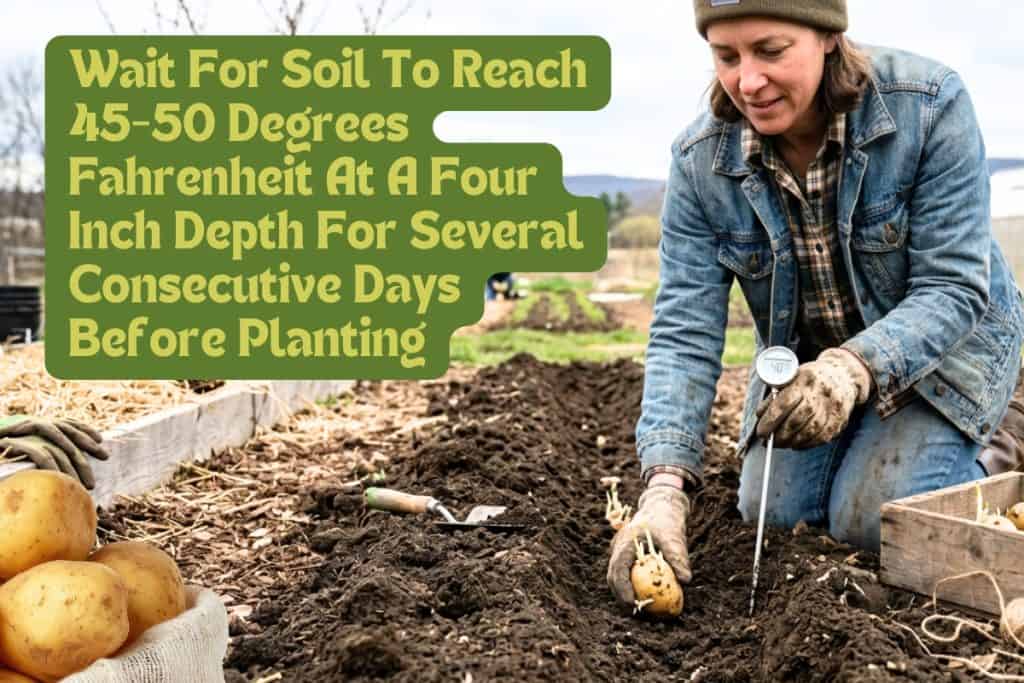
Step #4: Know When to Plant Potatoes
You may have heard that St. Patrick’s is the best time to plant potatoes. In reality, the ideal planting time is determined by soil temperature, not calendar date. Wait until 45–50°F at a 4-inch depth for several consecutive days before planting.
General regional guidelines:
- Zones 3–5: Late April to mid-May, after the last hard frost and soils have warmed.
- Zones 6–7: Mid-March to mid-April; late July for a fall harvest.
- Zones 8–10: Late January through February; September–October for a fall crop.
Seedlings are frost-tolerant, but a hard freeze (below 28°F) after emergence can kill young shoots. If a late frost is forecast, mound soil lightly over emerging shoots or cover them with row fabric.
Do you plant by the moon? The waning moon phase, just after the full moon, is considered the best time to plant root crops, because the moon’s pull is believed to encourage downward, root-focused growth.
Like potatoes, garlic thrives when planted at the right time; read how to grow garlic plants here.
Step #5: Prepare the Soil For Strong Growth
Potatoes are a root crop, so they need loose, well-structured soil. Compaction directly reduces yield and causes misshapen and stunted tubers.
Sandy loam to loam is the ideal texture. Avoid heavy clay wherever possible, and never plant in an area with standing water. Use raised beds or ridged rows if your drainage is poor.
The best soil conditions:
- Ideal soil texture is sandy loam to loam; avoid heavy clay.
- The optimal pH range is 5.5–6.0.
- Ensure drainage has no standing water by using raised beds or ridged rows.
Before planting, till or fork the soil to a minimum depth of 10–12 inches, then work in 2–4 inches of compost.
Add bone meal for early root establishment and incorporate a balanced fertilizer such as 10-10-10 at 4 to 6 inches depth before digging your furrow.
Since strawberries also love slightly acidic soil, check out our guide on growing sweet, juicy strawberries here.
Step #6: How to Plant Potatoes the Right Way
When planting, attention to depth, spacing, and orientation directly affects your final yield. Your soil type should determine the depth you choose for your furrow.
In heavier soils, use a shallow furrow of 4 to 6 inches and hill up as plants grow. In lighter, well-drained soils, a deep furrow of 8 to 10 inches supports larger root systems, reduces the need for hilling, and improves moisture retention.
Expect to see sprouts in 14–28 days depending on soil temperature and seed condition. Chitted seed in warm soil can break through the soil in as few as 10 days.
The 6 Steps to Planting
- Furrow Prep: Dig furrows to the appropriate depth for your soil type.
- Seed Placement: Place seed pieces cut-side down, with eyes or sprouts facing up.
- In-Row Spacing: Space pieces 10–12 inches apart. Tighter spacing yields more small tubers, while wider spacing produces fewer, larger ones.
- Row Spacing: Leave 24–30 inches between rows.
- Covering: Cover with 3–4 inches of soil without filling the trench completely; if pre-sprouted, leave leaves exposed.
- Finishing: Firm the soil and water just enough to settle it around the seed pieces.
Step #7: Water Potatoes Properly
Potatoes are surprisingly sensitive to uneven moisture. Inconsistent watering is one of the most common causes of hollow heart, knobby tubers, and cracked skin.
Aim for 1 to 2 inches of water per week, either from rainfall or irrigation, and keep that level steady throughout the growing season.
Key watering tips:
- Keep soil lightly moist, not saturated, from planting to emergence.
- Maintain consistent moisture during flowering and tuber set.
- Taper off watering as vines yellow and die back.
Drip irrigation is the preferred method as it delivers moisture directly to the root zone without wetting foliage, significantly reducing the risk of fungal disease. If using overhead irrigation, water early in the morning so leaves dry fully before evening.
Once vines have mostly died back, stop watering entirely to allow skins to firm up before harvest.
For another crop that needs careful moisture management, see how to grow an avocado from seed here.
Step #8: Hill Potato Plants As They Go
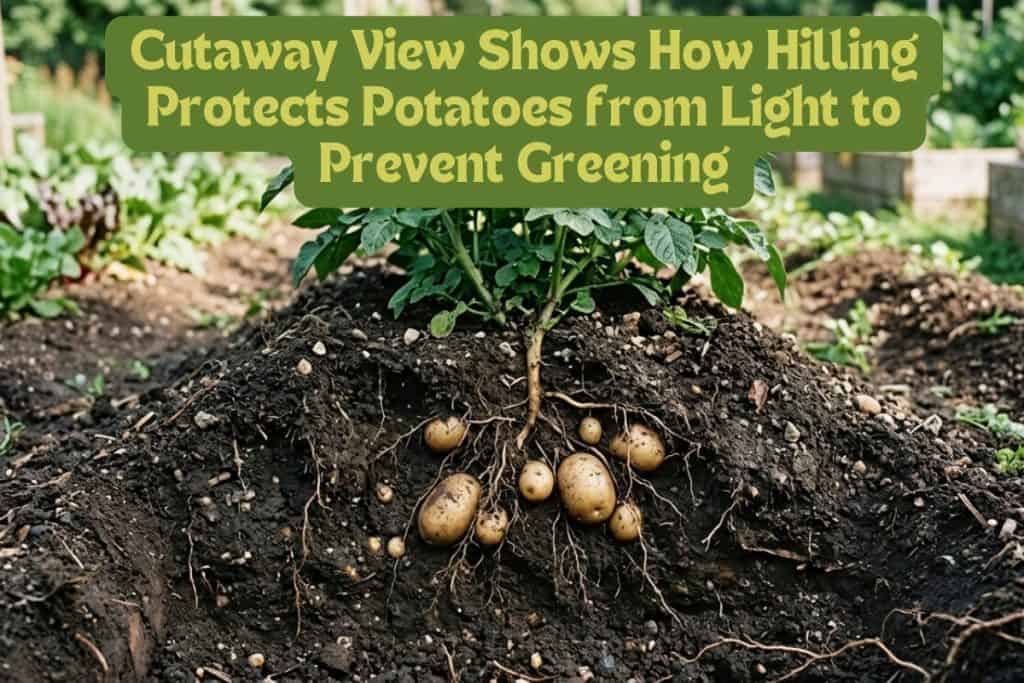
Hilling is one of the most important maintenance tasks in potato growing and should not be skipped. As plants grow, tubers naturally push upward and outward from the seed piece.
Without hilling, those tubers reach the soil surface, turn green, and become inedible due to the formation of solanine, a mildly toxic compound.
Beyond preventing greening, hilling also creates additional growing space for tubers, improves drainage around the stem, and helps suppress weeds at the base of the plant. Straw or weed-free mulch can be used in place of soil on the final hilling to retain moisture and keep root zone temperatures cool.
3 Hilling Stages
- First hilling: When plants reach 6–8 inches tall pull 3–4 inches of soil around the stem, forming a low mound and leaving only the top 2–3 inches of foliage showing.
- Second hilling: 2–3 weeks later, after another 6–8 inches of growth, build the mound to a final height of 8–10 inches above the original soil surface.
- Final hill: Maintain a broad, firm mound 4 to 6 inches above the original soil level
Maintenance Through The Growing Season
Once plants are up and growing, consistent monitoring is what separates a good harvest from a great one. Side-dress with a nitrogen-rich fertilizer when plants reach 6 to 8 inches and again at first hilling to support vigorous top growth.
Avoid excess nitrogen late in the season, as it pushes leafy growth at the expense of tuber development.

Watch out for:
- Colorado Potato Beetle: Yellow body and 5 brown stripes; hand-pick orange egg clusters under leaves. Treat with Spinosad or pyrethroid sprays.
- Late blight: Gray-green water-soaked lesions on leaves; act immediately, as it spreads rapidly in cool, wet conditions
- Early blight: Circular dark spots with yellow halos; remove affected leaves and apply a copper-based fungicide
- Scab: Rough, corky, pitted lesions on tubers; maintain soil pH at 5.5–6.0
Rotate your crop space every year if possible. Avoid returning to the same ground more than once every 3–4 years. When you are planning space, good rotation partners include brassicas (cabbage, kale, broccoli), legumes (beans), corn, and cover crops.
This one practice eliminates the buildup of soilborne diseases and significantly reduces pest pressure season over season.
Know When New Potatoes Are Ready
One of the big bonuses of growing your own potatoes is being able to dig new potatoes, immature tubers dug before the plant fully dies back. They are tender, sweet, and have much better flavor than anything you will find in a bag at the grocery store.
New potatoes do not store well, so plan to enjoy them within a few days of harvest for the best flavor and texture. Harvesting new potatoes is entirely optional and does not mean sacrificing your main crop.
4 Steps To Harvest New Potatoes
- Timing the Harvest: Wait approximately 2 to 3 weeks after flowering ends before digging
- Check Tuber Size: Look for tubers that are 1 to 2 inches in diameter, with thin skin that rubs away easily with your thumb
- Selective Harvesting: Reach into the soil beside the plant and remove just a few tubers per plant
- Protect the Plant: Disturb the main root system as little as possible so the plant continues producing a full size crop
Harvesting Mature Potatoes
For a full, mature crop intended for storage, patience pays off. The clearest signal that your main crop is ready is the natural die-back of the vines. When foliage yellows and collapses on its own, the plant has finished its work, and tubers have reached full size.
Signs your crop is ready:
- Vines have yellowed and died back naturally
- Skin does not rub off when pressed firmly with your thumb
- Days to maturity for your variety have been reached
For most mid and late-season varieties this occurs 90 to 110 days after planting. Wait for maturity; it will be worth it.
If you need to harvest before full vine die-back, cut the vines at soil level and wait an additional 10 to 14 days. This allows skins to firm up in the ground without further vine growth.
Never harvest immediately after heavy rain as waterlogged soil increases bruising and the risk of rot in storage.
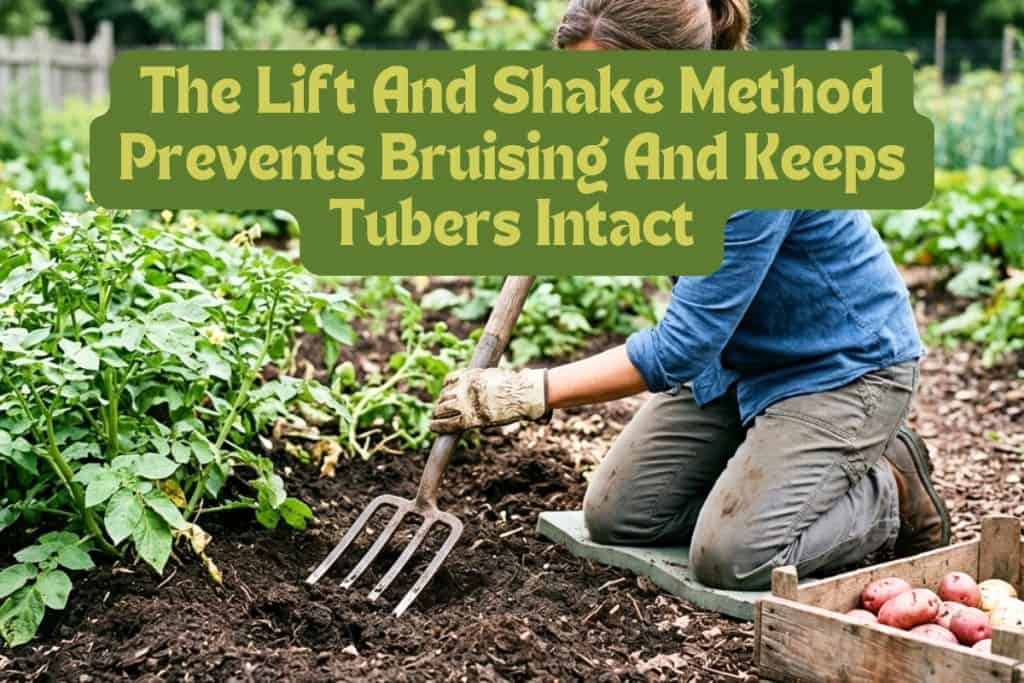
Harvesting Carefully to Protect Quality
Potatoes bruise more easily than most gardeners expect, and damage done at harvest directly shortens storage life. Use a digging fork rather than a spade, inserting it at least 12 inches from the base of the plant to avoid piercing tubers.
Handle each tuber individually when placing it into crates or buckets. Avoid dropping or tossing them, even for short distances.
Damaged tubers should never go into long-term storage as they will rot and spread to neighboring potatoes quickly.
4 Steps to a Clean Harvest
- Loosen Soil: Loosen the soil in a wide arc around the plant before lifting
- Gentle Lifting: Lift gently and shake away loose soil by hand rather than knocking tubers together
- Initial Drying: Set harvested potatoes onto the soil surface and allow them to dry for 1 to 2 hours before moving
- Sorting: Sort immediately, separating any cut, bruised, or damaged tubers for immediate use
Cure Potatoes Before Storage
Curing is the single most important post-harvest step and commonly skipped. Without it, storage life drops significantly. Just like when people get cut and heal, curing activates the potato’s natural wound-healing response, forming a new layer of skin over any cuts or scrapes from harvest.
A basement corner, a garage shelf, or an insulated outbuilding all work well for curing.
Once cured, brush off loose soil gently but do not wash potatoes until you are ready to use them. Washing before storage introduces moisture and accelerates spoilage considerably.
4 Steps To Cure Potatoes
- Initial Setup: Spread unwashed tubers in a single layer in a dark, humid space
- Ideal Conditions: Maintain a temperature of 50 to 60°F with high humidity, around 85 to 95%
- Curing Period: Allow tubers to cure undisturbed for 10 to 14 days
- Routine Inspection: Check periodically and remove any that show soft spots or signs of rot
Storing Potatoes For Long-Term Freshness
Properly cured potatoes stored under the right conditions can last 4 to 8 months, sometimes longer for late-season storage varieties. The two biggest enemies of stored potatoes are warmth and light, both of which trigger sprouting and quality loss.
Ideal storage conditions:
- Store at 38–40°F to maximize shelf life.
- Maintain 85–90% humidity to prevent shriveling.
- Keep in complete darkness to avoid greening.
- Good ventilation to prevent moisture buildup.
Store in breathable containers such as wooden crates, burlap sacks, or cardboard boxes with ventilation holes. Never store in sealed plastic bags.
Check stored potatoes every two to three weeks and promptly remove any that are softening or sprouting heavily to protect the rest of the batch.
There are natural sprouting suppressants worth trying. Place dried spearmint, peppermint, or rosemary with stored potatoes. The strong oils in these herbs have been shown to naturally slow sprouting.
Save Seed Potatoes For Next Season
Saving seed potatoes from your own harvest is a rewarding and economical practice, though it does require some discipline in selection.
Choose only the healthiest, most vigorous plants from your crop as your seed source, never tubers from weak or disease-showing plants.
What to look for in saved seed:
- Tubers from the most productive, disease-free plants only
- Firm, smooth skin with no scab, discoloration, or soft spots
- Size between 1.5 and 2.5 oz, roughly egg-sized, for best performance
Store selected seed potatoes separately from your eating stock and label them clearly. Be aware that saving seed from the same stock year after year can gradually accumulate viruses that reduce yield over time.
Refreshing with certified seed every three to four years is strongly recommended to maintain vigor and productivity.
Final Advice
My parting advice, from one grower to another: don’t let the length of this guide intimidate you. It all boils down to a handful of steps. Start with certified seed, adjust your soil pH to 5.5–6.0, water consistently, hill on time, and give your harvested potatoes the curing and storage conditions they need to stay edible long term.
Do those things, and the crop will take care of itself.
If you can, finish the season by planting a winter cover crop like crimson clover. It looks beautiful, fixes nitrogen into the soil, and keeps weeds under control; setting you up for a better season next year
Every garden is different, every season brings its challenges, but as you work through them you learn lessons no guide can teach you. Now get out there and grow some great potatoes.
Happy Growing!


11 thoughts on “8 Essential Steps to Growing, Harvesting, and Storing Your Best Potato Crop Ever”
I planted potatoes in a hoop house for the first time today. When should the initial watering be done. Weird weather this year it Michigan so we are trying something different.
It is almost always best to water anything at planting becuase watering helps settle the soil around your roots or in this case tubers. There has to be soil contact and you don’t want air pockets around the tubers. Do your first watering whenever you can, then wait and watch, I know you have been cool there.
Do you need to remove flowers from the potato plant or can they be left to bloom and die off naturally?
You can just leave the flowers. They will fall off soon. Thanks for reading!
Is a chicken wire cylinder layered with straw and dirt then potato seeds (from co-op), dirt and repeat rows up to 4 or 5 a good way to grow? It’s my first time and I don’t have a good area of ground for them. Also, topsoil okay to use?
Yes, the chicken wire sylinder layer method is a great way to grow. You can also use stacked crates or laundry baskets, or anything that lets you keep adding on layers of soil and staw. Topsoil is great also. Just make sure you buy straw and not hay, otherwise you are set.
Great read. Thank you.
How do you store seed potatoes?
The main thing is to make sure they stay cool, dry, and get plenty of air. I usually use a paper bag or a cardboard box, something that lets them breathe. You can put them in the refrigerator if you have room. Try to keep them at about 40 to 50 degrees Fahrenheit, and they should be just fine until you’re ready for planting.
Are there different rules for growing fruits and vegetables in your basement. I’m doing that now so far everything looks great. What should I be looking out for?
Especially about using the same soil again over and over again.
I honestly have never grown fruits and vegetables in a basement except as hydroponics. The electricity that it would take to keep enough bright light for fruiting crops would outweigh the cost savings for most people. But, here are my main thoughts. Yes, basement growing has different rules: you’ll need bright grow lights, stable temperatures and humidity, airflow, and drainage. You will have to encourage pollination. Reusing soil is possible, but eventually there will be nutrient depletion, pH change, salt buildup, and disease buildup, so switch out the soil at least every other year.